| Planking
I am using Okuome plywood (BS1088 spec) for the planking in 4 and 6 mm thicknesses. With this frame I have found that it is NOT necessary to scribe and then saw each plank to fit. Rip the planks to width (I used 6 inch). Bevel each "trailing" edge which is where the new plank fits against the one previously laid. Use a jack plane or block plane to do the final fitting. Most only required 1/16" of edge removal and only a few required 1/8"of trimming. Renew the bevel after trimming. This is the extent of the spiling that is needed. The planks are short and the curvature of the hull is not extreme, which reduces the amount of edge curvature needed. If you over-trim and the plank seems hopeless, just re-joint the edge or rip it slightly narrower. I ran the planks at a 45 degree angle and this seemed to fit the curvature of the frame well.
|
|
|
|
|
|
|
|
| Plank Sizes
6" wide planks worked reasonably well. If I were to do it again I would use 6" planks for bottom and center section of sides. There is a bit too much edge lift at ends where the curvature is extreme. I would use 5" planks forward of front cockpit and aft of rear cockpit. Minimize the number of widths to allow re-use of the scraps. At the transom, do not let the planks run too long. Trim within 1/2 inch of transom prior to gluing. If left long, the staples pull out as the plank does not want to take on the transom curvature. Plank layout and gluing The planks are dry fit and stapled lightly in place. I started in the middle and worked towards both ends. Number the planks and mark the position of the battens and frames prior to removal. Leave the starting or master plank in place as a guide. Put the glue on the frame (1.5-2" foam brush - stroke in 1 direction only to avoid breaking brush). Have your helper "butter" the beveled edges with glue. Once several planks are fastened, you can remove and glue down the master. ~15 planks per session is the limit for me to get glued down and cleaned up. If you have another helper inside doing clean up, progress will be MUCH greater. I normally staple the inner package of staples at a convenient point on the boat bottom. This keeps the staples in reach and they won't fall off due to the constant pounding. I used ~1 stick per plank on average (Arrow T50 type). There is a lot of reloading with sticky fingers. At the end of the session discard any staples in the package which have glue on them. Otherwise, you will forget and have a jam in the middle of the next glue session. Lighting There is a lot of time spent under the hull for clean-up and filleting. Good lighting is important. The kids strung a set of C9 (7.5 watt) white Christmas light bulbs over the motor stringers. These work well, provide even light and are not too hot. The bulbs are at head level inside the hull. Inside clean up This is the most tedious part so far. Every batten edge and the seams need to be cleaned up and the squeeze out is formed into fillets. I used a small amount of ash flour in the epoxy in addition to the micro fibers and colloidal silica. This gives a nice color match and helps the fillets blend in better. I ended up using my finger tips - not recommended - but I could not do it otherwise. Watch for errant staples. They rip open the skin quickly and epoxy in the cuts is not pleasant. Clean up is then finished with rags and denatured alcohol. I wear a respirator and have the door cracked open. There are two dangers - Fume buildup to toxic levels in the enclosed space and explosion hazard. Watch out for both. I removed the deck carlins in the cockpits to make it easier to crawl around under the hull. |

Bottom nearly completed and both sides started. Note balanced application of planking on the sides. My Dad is taking a break from fitting of the planks. |
| Mount frame higher
This is a very tight squeeze for me using the recommended mounting height. I am rather large (6', 230lbs) but the belly size is not the limit, it is my sternum getting scraped up as I slide under. I have loosened the rear most frame support and position a hydraulic floor jack under the transom. Use blocking to prevent crushing the transom plywood. 1" of lift provides much needed comfort on getting in. As you can see the gap under the edges is very small. If I were to do this over agin, I would mount the motor stringers 2-3" higher on the legs. |
 |
| Fairing first layer
Lots of sanding again. Belt Sander (3x24 50 grit) for first pass over the seams and initial clean up. "Air file" pneumatic long air sander (40 grit) for final shaping. Lost 3 belts due to staple ends left sticking up! Staple pulling quality control is now improved. Air file (next to coffee cup) is great for smoothing. Air consumption is huge. My 6.5 HP compressor runs continuously when air filing. It still maintains 90 psi, but does not cycle off at all. You can feel the heat radiating from the tank and compressor from a couple of feet away! Limit work sessions. This is hard work (especially at the stern). At the stern where the sides curve under you rate of progress will slow to less than 1/2 that of the rest of the sides. Upon returning after a break, I find that my fresh start lends a more critical eye to the progress and shaping. |
 |
| Scarfing scraps
The bottom was completed with almost no waste other than the triangles. The sides are another matter! Cut-offs are almost 2 feet long. I scarfed these together along the 45 degree bias cut that remained from the initial trimming. These are then used on the second layer. I alternated fresh strip - scarfed strip to allow easier fairing. This scarfing was time consuming, but saved ~1.5 sheets of plywood. To cut the scarfs, there are a variety of techniques. I did it on the tablesaw. Set for 7 - 8 degree angle. Install a new blank insert. Plunge up through the insert. You want a nearly "zero clearance" opening. Install a 4-6" tall board on the fence as a tall sacrificial fence face. The fence will almost touch the blade. Guide the pieces through with both hands which MUST rest on the fence. There is a high danger of getting the piece pulled from your hands (with your fingers following into the blade). The leading edge of the piece will lose its support during the cut. The support for the piece is the trailing edge and your hands. This is a moderately dangerous technique. DO NOT attempt if you are at all uncomfortable with the technique or do not have a footswitch for the saw. I set up 2 boards on my WorkMate (1x8" as a base and the other (1x3") as a reference fence) and staple each layer down. Fold poly sheeting back and forth between layers to allow release. 10 layers at a time seems the practical limit. Stagger the seams slightly side to side. 2 large clamps with a caul over the seam area clamps the entire stack. The caul has 1/8 downward curvature and this seems to nicely spread out the clamping pressure. The pieces came out requiring very little sanding and only minor edge jointing.
|
|
| Next: Stapling | |
| Home | Top of page |
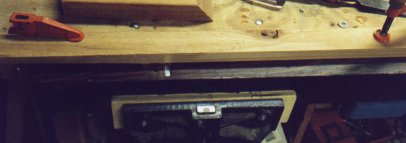
 Here
is a wooden plane clamped in a bench vise. It is upside down with
another board clamped on to act as a fence.
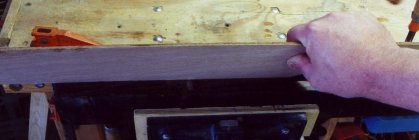
 Here
is a plank being beveled prior to fitting in place. 2-3 passes are all
that is required to bevel the edge.