3 point bed leveling was needed. I really should have done this from the beginning. 4 point is way too hard to do and results in warped plates. 3 point gives nice control and no warping problems. The right side of the heated bed has the single screw.
I now have it set up with 3 “glass cutting board” build plates. One is plain glass for PLA, a second has blue painters tape for PETG, a third has a layer of PEI attached for other filament types. The cheap glass cutting boards are working out great for build plates: Premium Tempered Glass Cutting Board Bundle 4 Pack – 11.75″ x 15.75″
by Clever Chef Link: http://a.co/goO8N7c
Next I tackled switching over to the thermocouple temperature sensor for the print head. The amplifiers finally came from China.
The thermocouples have a major advantage over thermistors for high temperature sensing as they can go to much higher temperatures. These will be needed for printing Nylon, Polycarbonate and other materials. The amplifier is very simple see: http://reprap.org/wiki/ExtThermoCouple_1.0
What is not mentioned anywhere is that when you configure for the thermocouple amp for the Rumba board you must connect it to a different input pin! I had to dig through the .h header files and then the schematic to finally figure this out. Otherwise the system was saying hte temp was 398 degrees C at ambient air temp due to the open circuit. In the photo below, the lonely yellow wire is the output from the thermocouple amp. 
All of the other temperature inputs are on the left edge of the board, neatly arranged.
After I had it connected and reading the correct ambient temp, about 22C, it was time to run some tests to tune the heater control circuit. The heater control is done by a PID control loop. Most of my control loop theory and Laplace transforms are long forgotten. So I decided to use the PD auto tuning of the Marlin firmware. There were a few initial runs, but now I need to get serious. Here is one of the first attempts at running with the thermocouple. The output is very noisy and the temperature control oscillates will not settle down

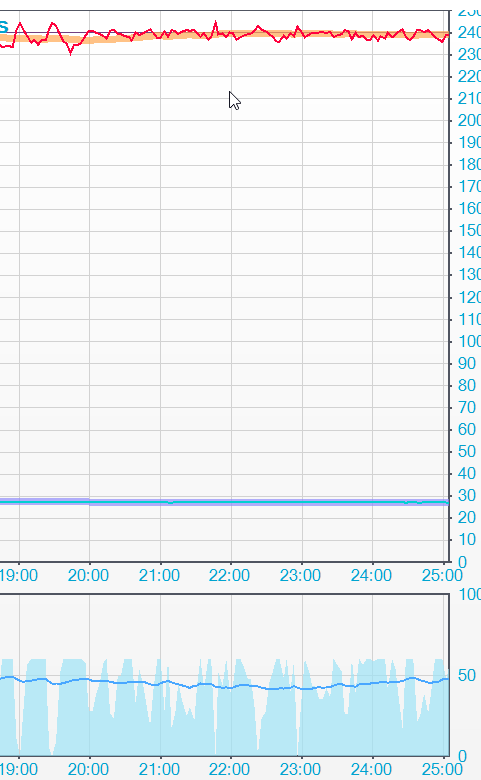
The results when running the auto calibration were not great. Part of the problem was excessive noise on the temperature sensor lines. I had to move the amplifier up near the print head to make it be usable. There is still more noise on the temperature feedback than I would like, but it is running with reasonable stability. I ended up using the recommendation for the PID settings form Micron EME that makes the print head I am using. Here is a print head heat plot made while printing a cover for the enclosure for the Rumba controller board that I am using.
 I am now printing PETG with some reliability, but I still have some problems with the filament stripping and jamming at the drive gear. One other problem was the PETG filament had absorbed moisture over the last month, leading to lots of tiny bubbles in the extrusion. I “baked” the filament for 24 hours at 100 degrees (bread proof setting on my oven) and this cured most of the bubbles by driving off the moisture. The filament will now be stored in a plastic box with silica gel to absorb the moisture.
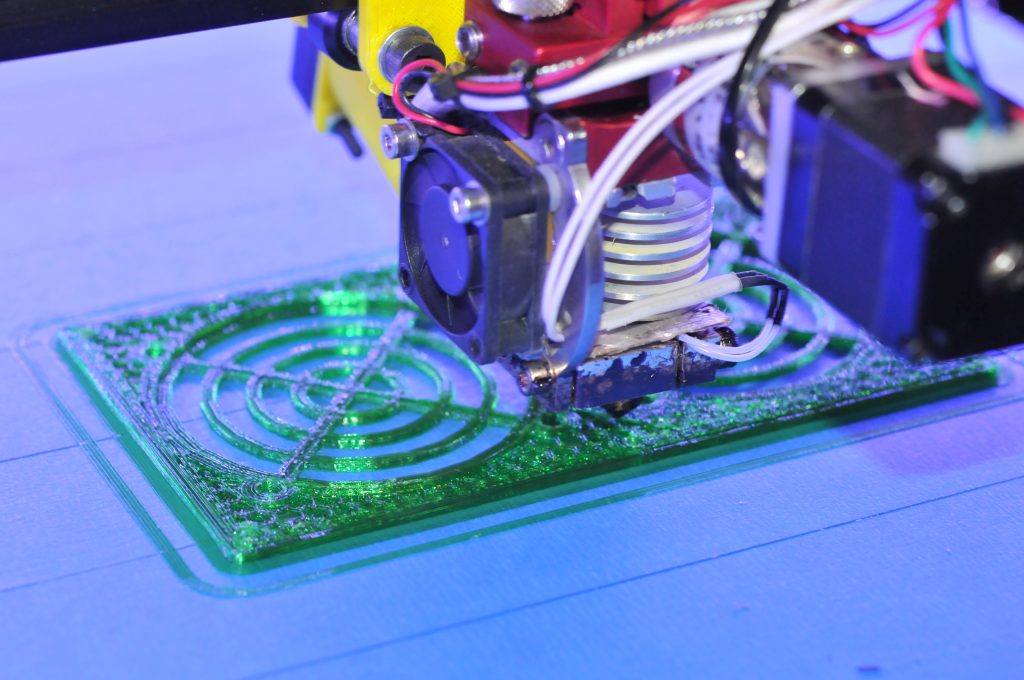
Here is a shot of the top cover of the Rumba board case being printed. Teal says the printer sounds like an old school video game while doing the fan openings.
Additional links:
http://reprap.org/wiki/RUMBA