When delving into the baking of sourdough bread, the questions often arise faster than the answers. This is especially the case where you don’t have someone to teach you in person and are trying to figure it out from books and youtube:
- How much starter to use?
- Why “discard” starter – seems wasteful?
- How stiff or wet / slack should the dough be?
- How much to mix / knead and when?
- What is “folding”?
- Why does my bread fall when I slash it like they say to do in the cookbooks?
- Is steam important?
I will try to answer these and more based on my experience and experimenting of the last few years. Your experience may differ but I think this provides a solid starting point. I think it is good to work your way up in complexity as you gain experience and confidence. Don’t jump in and make multigrain baguettes with lots of seeds as your first try. How about white bread in a dutch oven or loaf pans?
I was given some sourdough starter from some friends a few years back and they also recommended the book Bouchon Bakery.
This book provided a start, but I was still unsure of the what the texture should be and I also jumped into the more compex styles too quickly. So there were some super dense breads that resulted and I was still relying on commercial yeast to help.
I keep my starter in a glass crock with snap top lid in the back of the fridge. In peak bread making season, I am baking every 1-2 weeks and this keeps the starter in good condition. If it is neglected for a long time (weeks or months) there will be gray liquid film on top and the starter will take longer to become active again. Don’t discard this, but you will need to build it up prior to use (future posting).
Safety first, the starter is a mix of yeast and bacteria. Each time you add flour you may add more types of bacteria and different kinds of yeast. Treat the starter and uncooked bread dough as you would raw meat. Wash your hands and utensils well after handling and never eat the raw dough!
Preparing the starter


The day before you want to bake, you will need to make your starter. You will also see the terms Biga and Poolish for this.
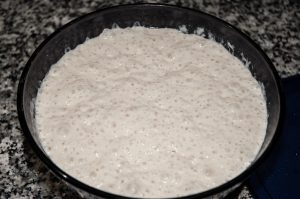
I have settled on using 2 cups bread flour , 1.5 cups warm water and the entire contents of my crock (pour off any excess liquid on top first).
Mix this up and place on the kitchen counter in a covered bowl.
I really like the Pyrex 10 cup prep bowls and their lids for this.

The next morning remove about 1/2 cup of the starter and return it to the crock. Place the crock in the fridge.
Now is the best time to take any out to share with friends.
Preparing the dough

Take the remainder and put it in the mixer bowl. Add 2 cups of bread flour and 3/4 c water and stir this together. If the flour is really dry you may add a few Tbsp more water but resist the urge to add much right now. Now let the mixture sit for 30-90 min (I usually make breakfast and start other projects during this time). This is referred to at the autolyse. The flour is hydrating and it will then make a better dough once you start mixing / kneading.
Add 2 Tbsp vegetable oil . This yields a silkier dough and it seems to stay fresher longer than if you omit the oil.
Add 1.5 Tbsp Honey – you could use sugar, but the simple sugars of the honey seem to get the rise off to a quicker start. This is not to make the bread sweet, but provide enough sugar that the yeast and bacteria have enough to feed on during the rises over the course of the day
Kneading the dough


Start kneading the dough. I use a Kitchenaid stand mixer with a dough hook and the speed set on 2.
As it is kneading, evaluate the texture. Is it stuck to the sides or pulling away in a ball? If sticking to the sides, start adding flour a couple of Tbsp at a time , letting it fully incorporate before adding more.
After 5 min at 1 tsp fine sea salt. This will cause the dough to firm up as it mixes. You can omit the salt if you are on a salt restricted diet, but even this 1 tsp is much less than most commercial breads use.

Continue kneading for 5 min more. the dough should be pulling away form the sides as it is mixing and only stick to your dry hand a little when you touch it. Adjust adding flour or water in small increments 1-2 Tbsp flour, 1 tsp water as needed. If you do bigger amounts it is very easy to overshoot and end up in a flour-water-flour-water cycle and before you know it you have used up your flour and have enough dough for 4 loaves of bread!
Cover with a damp towel for the first rise. Place on the counter at room temperature.
References:
https://www.kingarthurflour.com/blog/2017/09/29/using-the-autolyse-method
