After months of research, reviewing the Facebook laser groups and basically overthinking the decision, I purchased a CO2 laser cutter / engraver. I had analyzed the type of work to do (everything from signs, and gifts, to engraving , cutting veneer and thick wood). This lead me down the path to one of the higher powered units (80w minimum). I also measured and remeasured the prospective locations in the shop to see what could fit (as the shop was already pretty darn full). Then one day as was again looking at the manufacturer/ importer’s website a unit showed up at a great price in their refurbished section. I got my wife, Teal’s OK and jumped on it.
So I ended up with an OMtech 35×55 130 watt unit. This is as big as could possibly fit in my shop. I liked the idea of a refurbished unit, due to the big $$ savings and after watching the Facebook groups, I figured the common problems I could fix (minor shipping damage, bent metal case, beam alignment, etc.). The high cost items (laser tube and power supply) were tested and came with a warranty. Mechanically, a laser is just built like a really large 3D printer (and I had built one of those from scratch).
Delivery
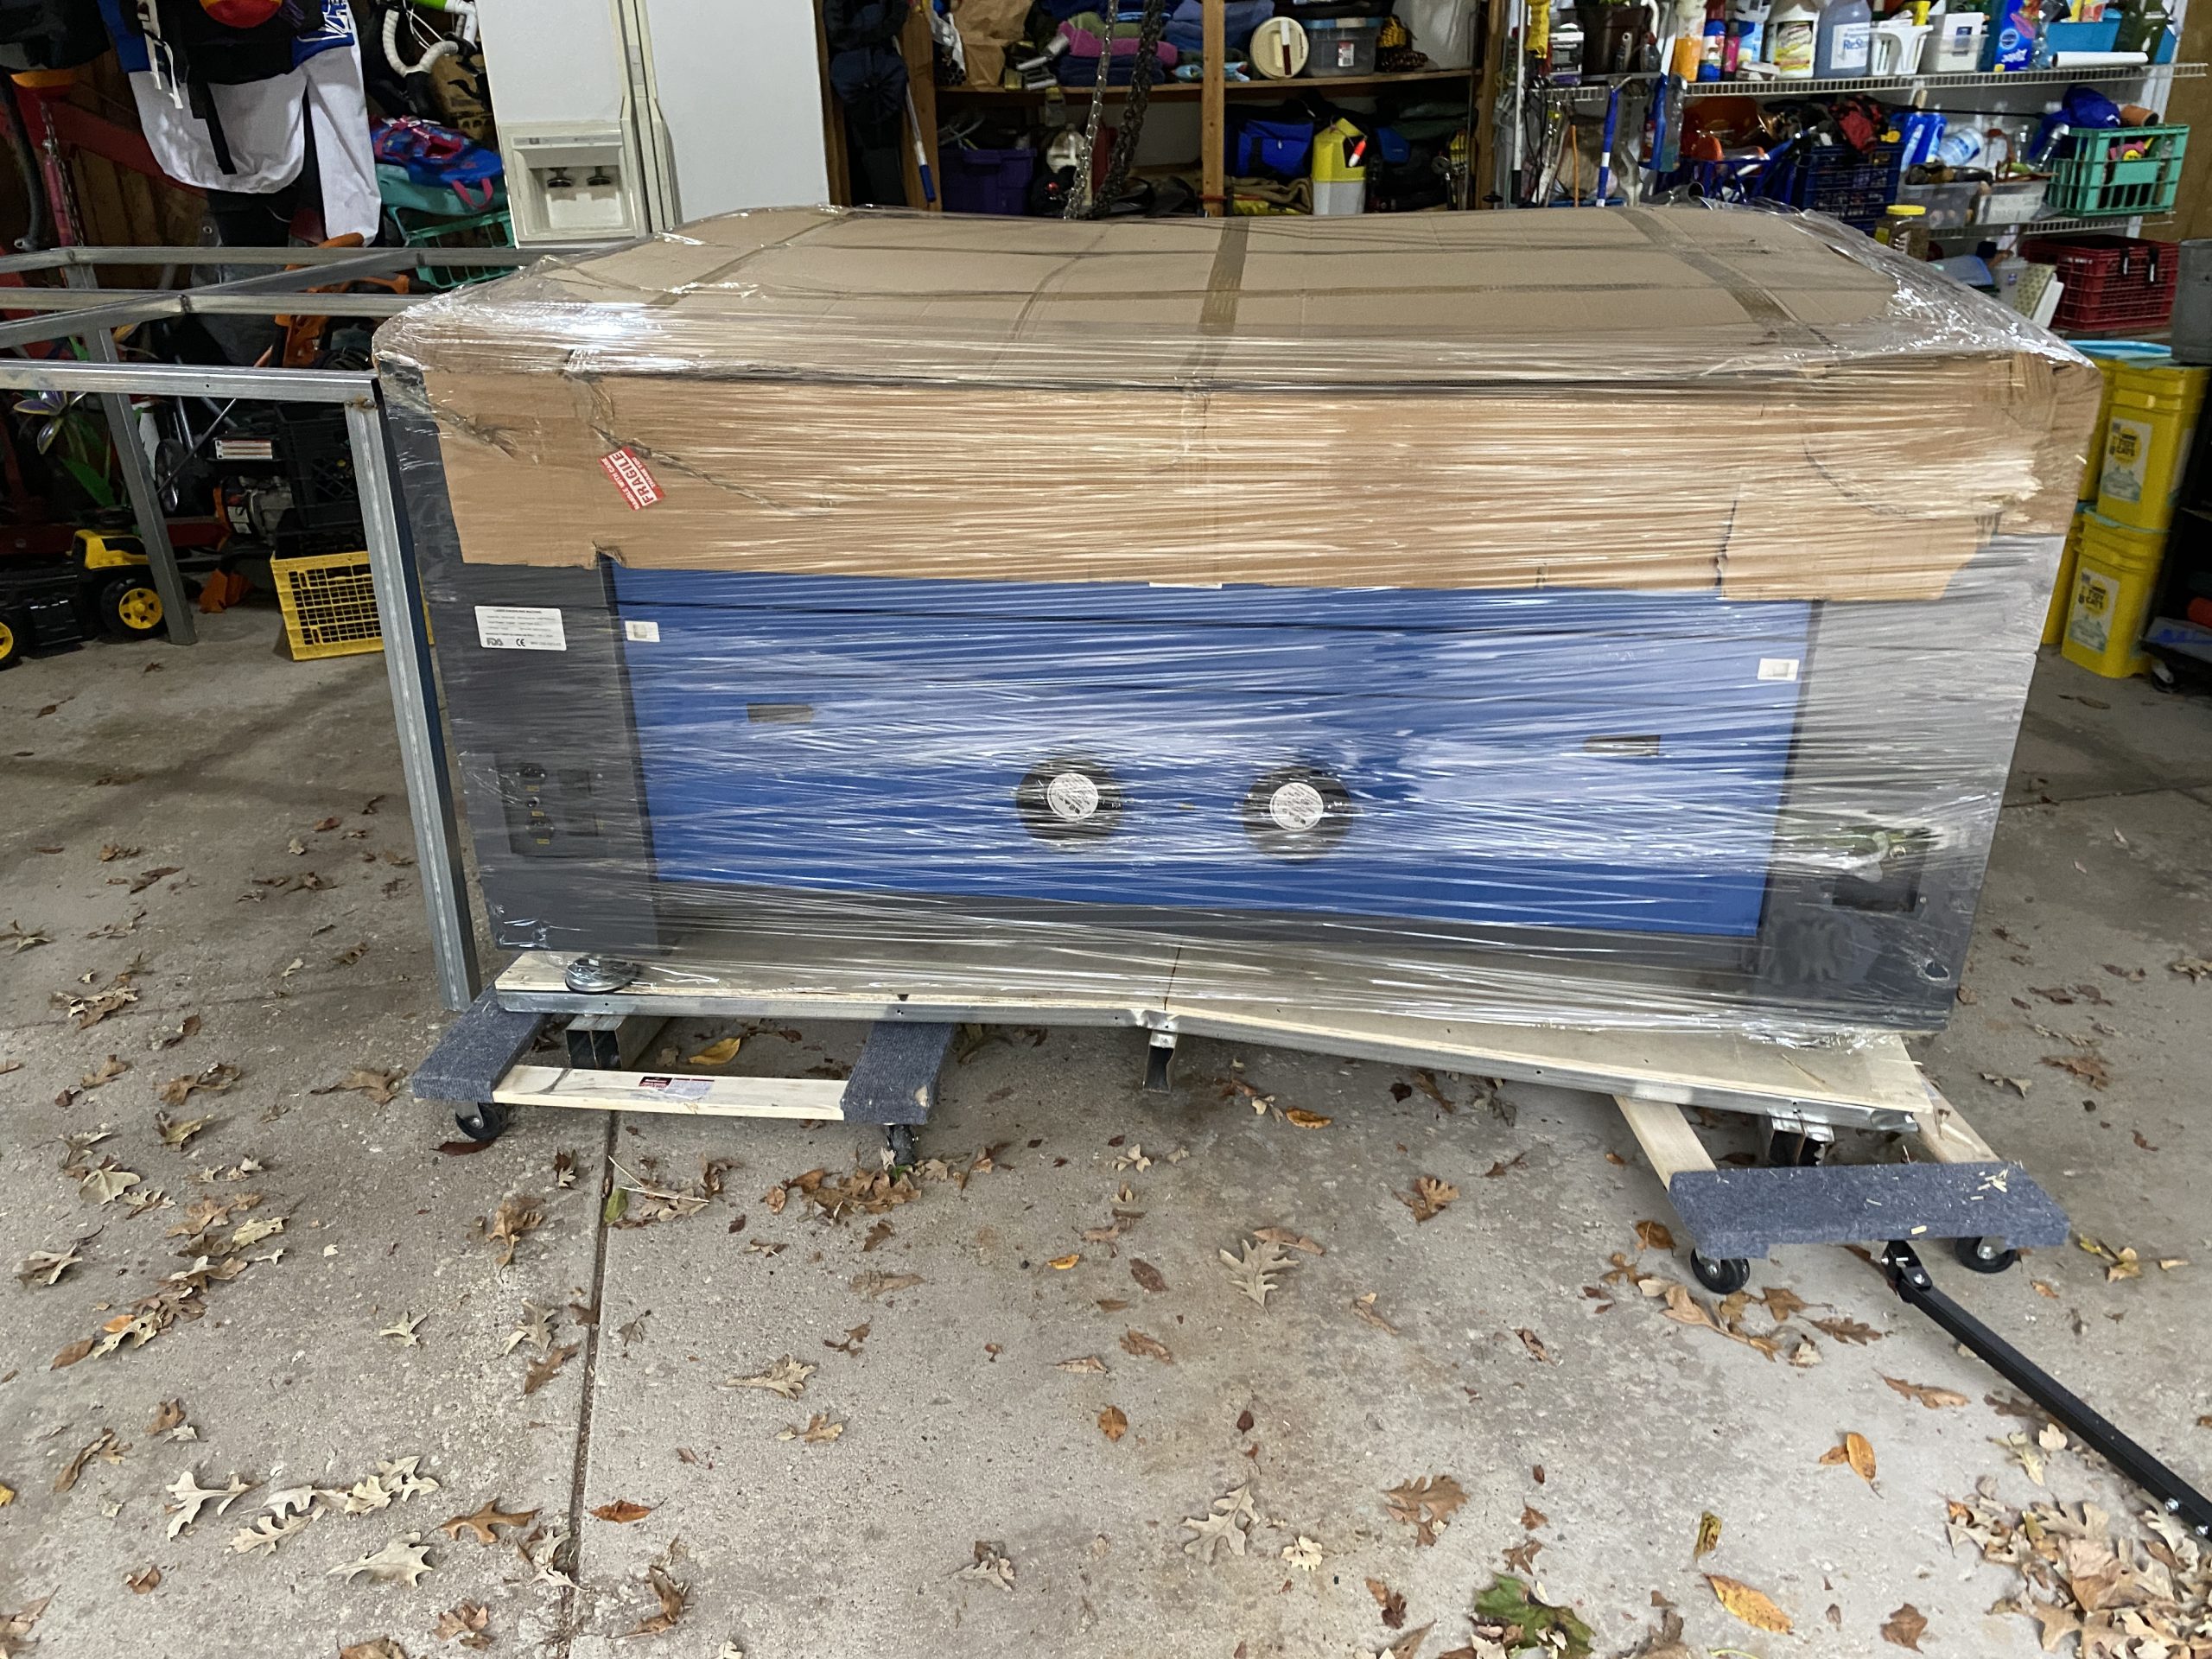
So then came the waiting. A few days to ship, and then I could get real time updates on its location as it traveled from the west coast. Most were reasonably accurate aside from the apparent teleportation to and from eastern PA over a few hours. Finally I get the call to schedule the delivery and remind them that this is a residential delivery, liftgate service is required and it will be delivered at the top of a steep driveway. They say OK and I waited. On the scheduled delivery day morning we get another call and they apologize and say it would not fit on the truck. There was some more questioning about “did I understand just how big this thing is and how to move it” (approx 7x6x5 feet and 1100lbs) . I said yes, as I used to move and install x-ray equipment in my younger days. They propose sending it out first thing the next morning (7:30). I say OK. The truck arrives, and the driver backs up the driveway. He opens the door gets in and looks and is shaking his head and calling the dispatcher. The box is in lengthwise, the bottom is crushed and he cant get the pallet jack under it and it is bigger than the liftgate. I told him that: “we can do this”. I then produced three 4 wheel dollies a bunch of 4x4s for cribbing a 5 foot pry bar. Then I started moving it, jacking it up and he could get the pallet jack under. I coached him on getting it out on the liftgate and rotating it as we go (I nearly fell off twice). The dollies were getting badly damaged in the process. However we were able to get it on the liftgate (hanging off the back by nearly a foot) and “down”. However “down” as still 6-8 inches in the air as the liftgate would not touch the ground due to the truck being on a slant. SO we used it as an opportunity to shift how it was on the dollies as we slid it off. Once on the ground the truck driver left (with a nice tip). I did note the crate was damaged on the bill of lading.

About this time, help (Paul and David) arrived. We tried pushing to get it into the garage before the rain started but the damaged dollies would not cooperate. I grabbed the 2 floor (car) jacks, and we used these to get the leading edge up and have something to pull with and got it into the garage under the spot where the chain hoist was hanging. Once in the garage David and Paul left for work so I was on my own again. Note the handholds in the photo above. There was another sticker that said “Team Lift”. What team? A whole rugby or football team??? It was now time to uncrate and assess the damage.
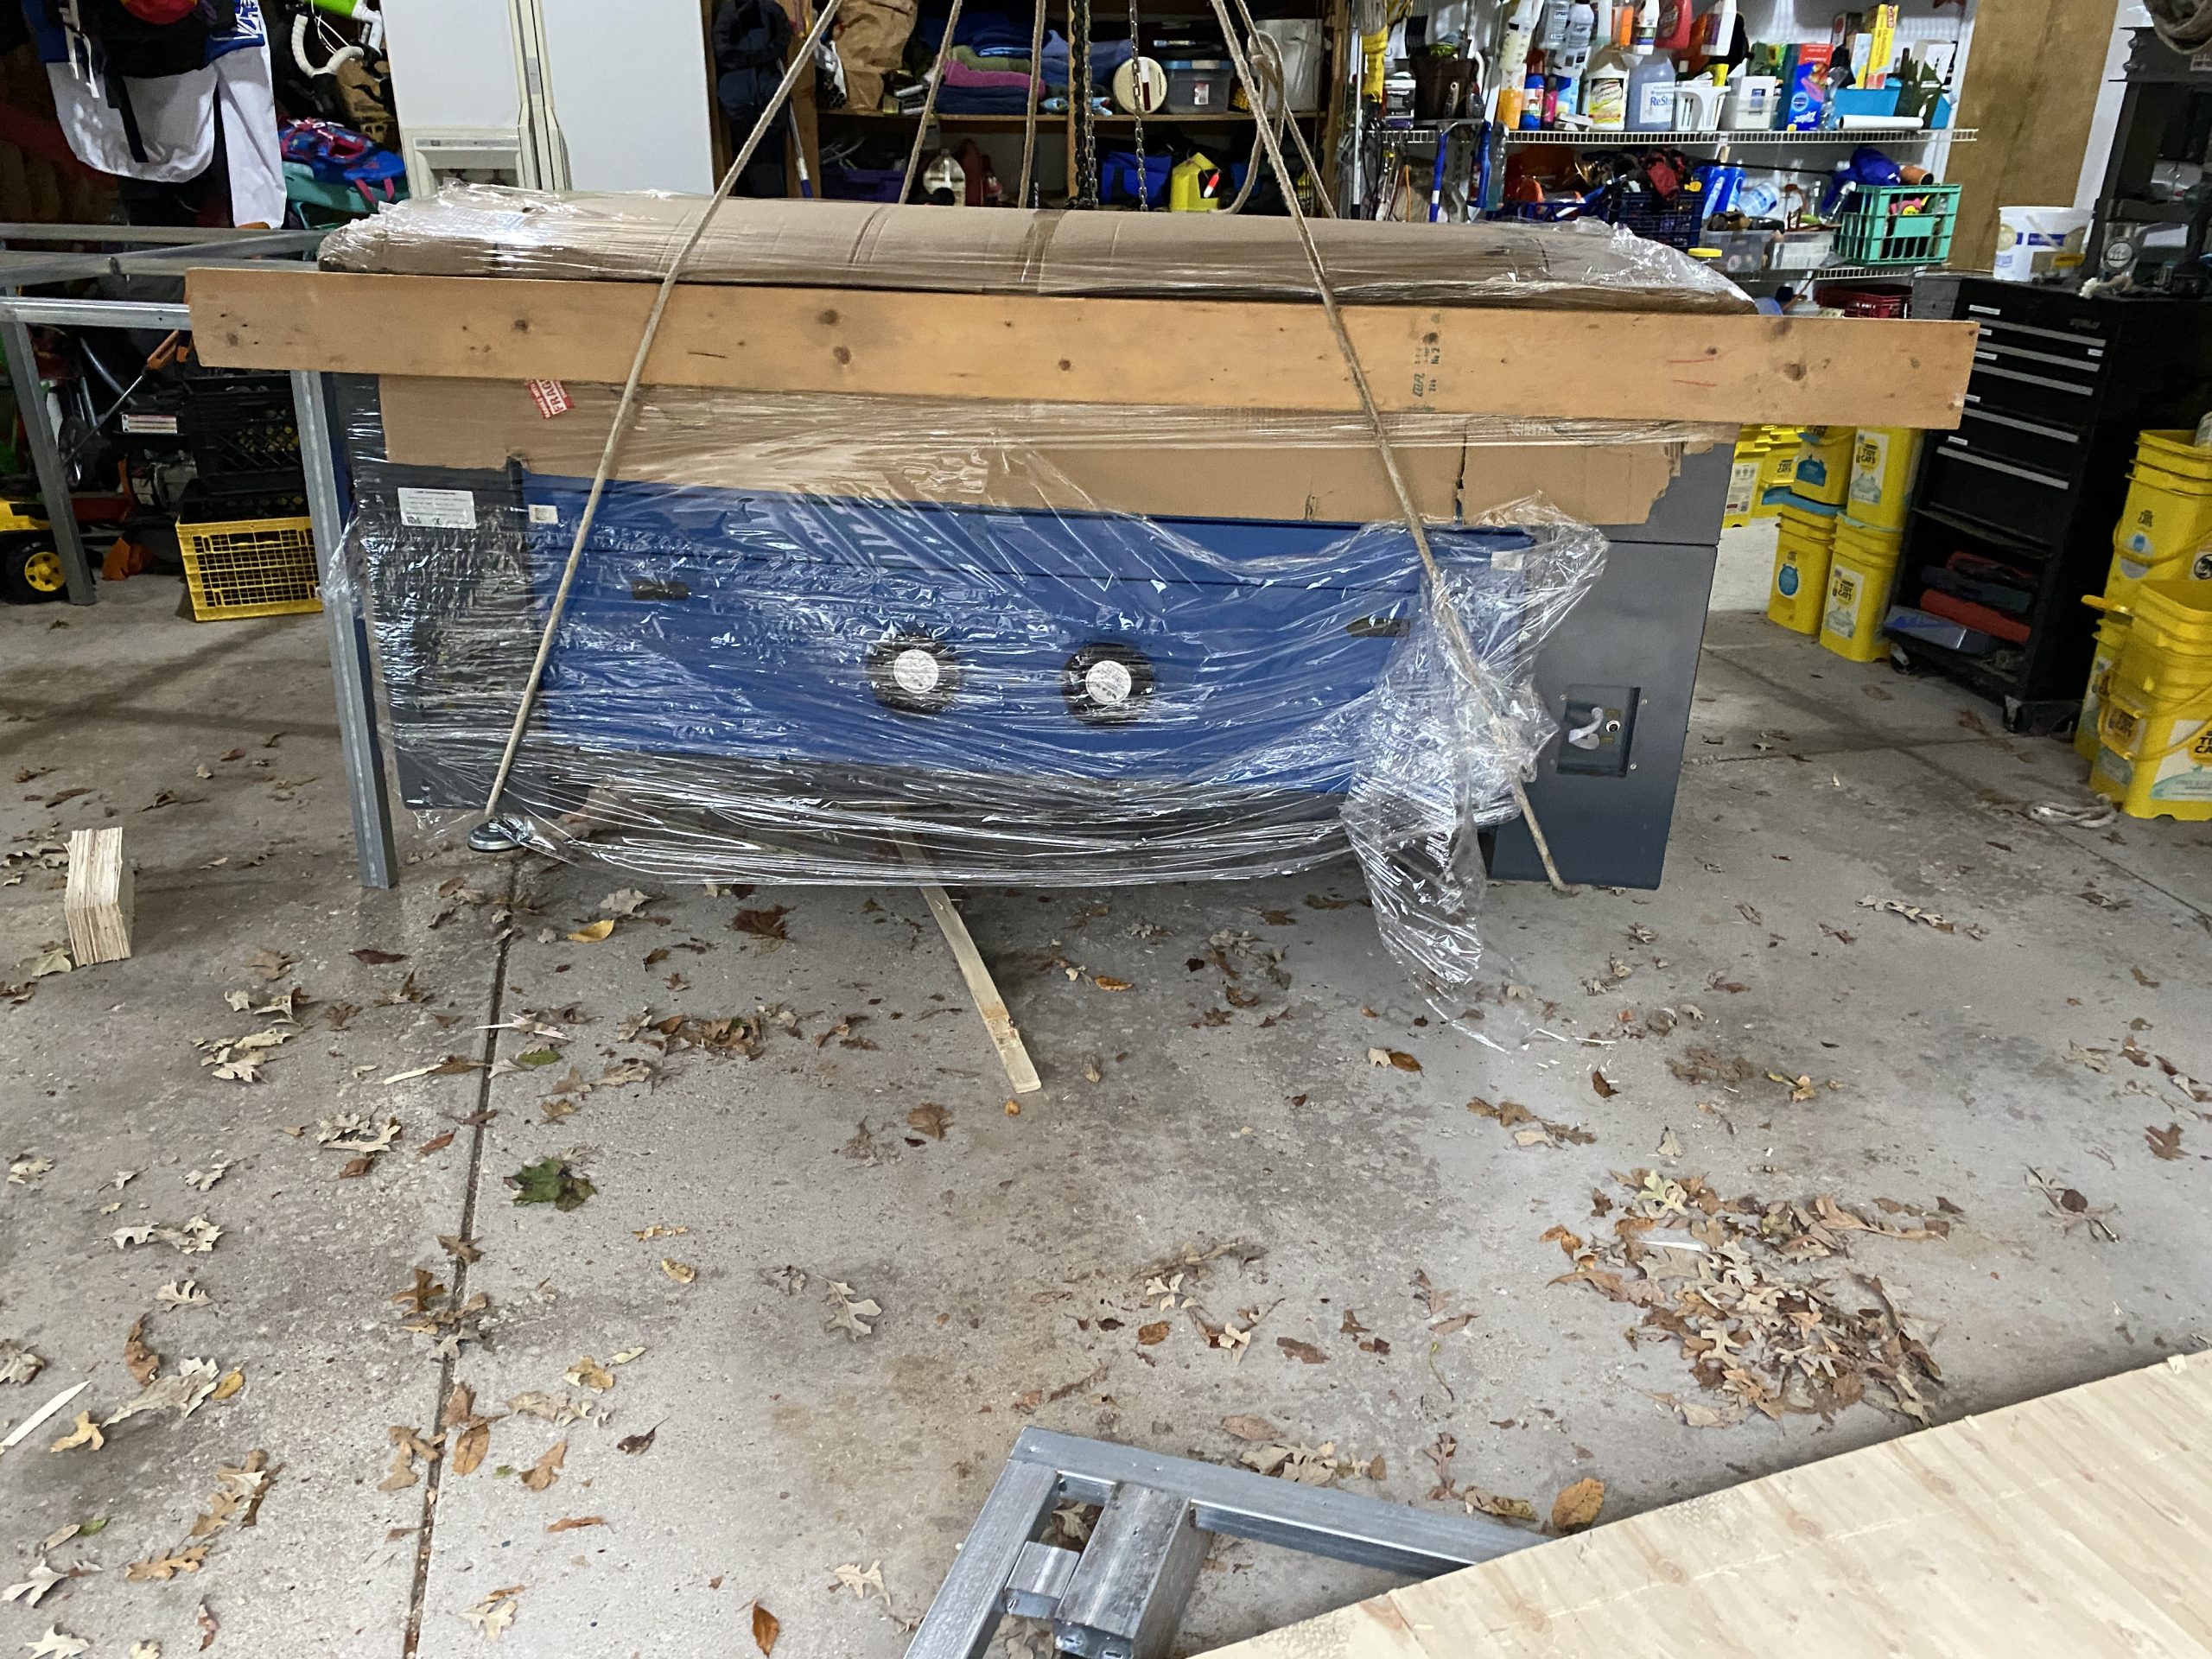
The 2x6s (3 of them stacked across 6 trusses to spread the load) and chains were still in the roof trusses of the garage from other projects (13″ SB metal lathe, Bridgeport Mill), so we have the (tested) structure to lift heavy items and get the laser off of its skid. The chain hoist was reattached and then heavy 3/4″ nylon ropes were looped around each end against the feet and up to the hook of the hoist. 2x6s were placed across the sides to shield the doors from being crushed as tension was applied to raise it up. The skid was unscrewed from the remaining feet (only 1 was still anchored to the skid, 2 had pulled free and the 3rd snapped off), and pulled the skid out. 2 of the 3 four wheel dollies were badly damaged with bent casters and ball bearings falling out and returned to Harbor Freight (1000lb load rating must be static only – no moving).
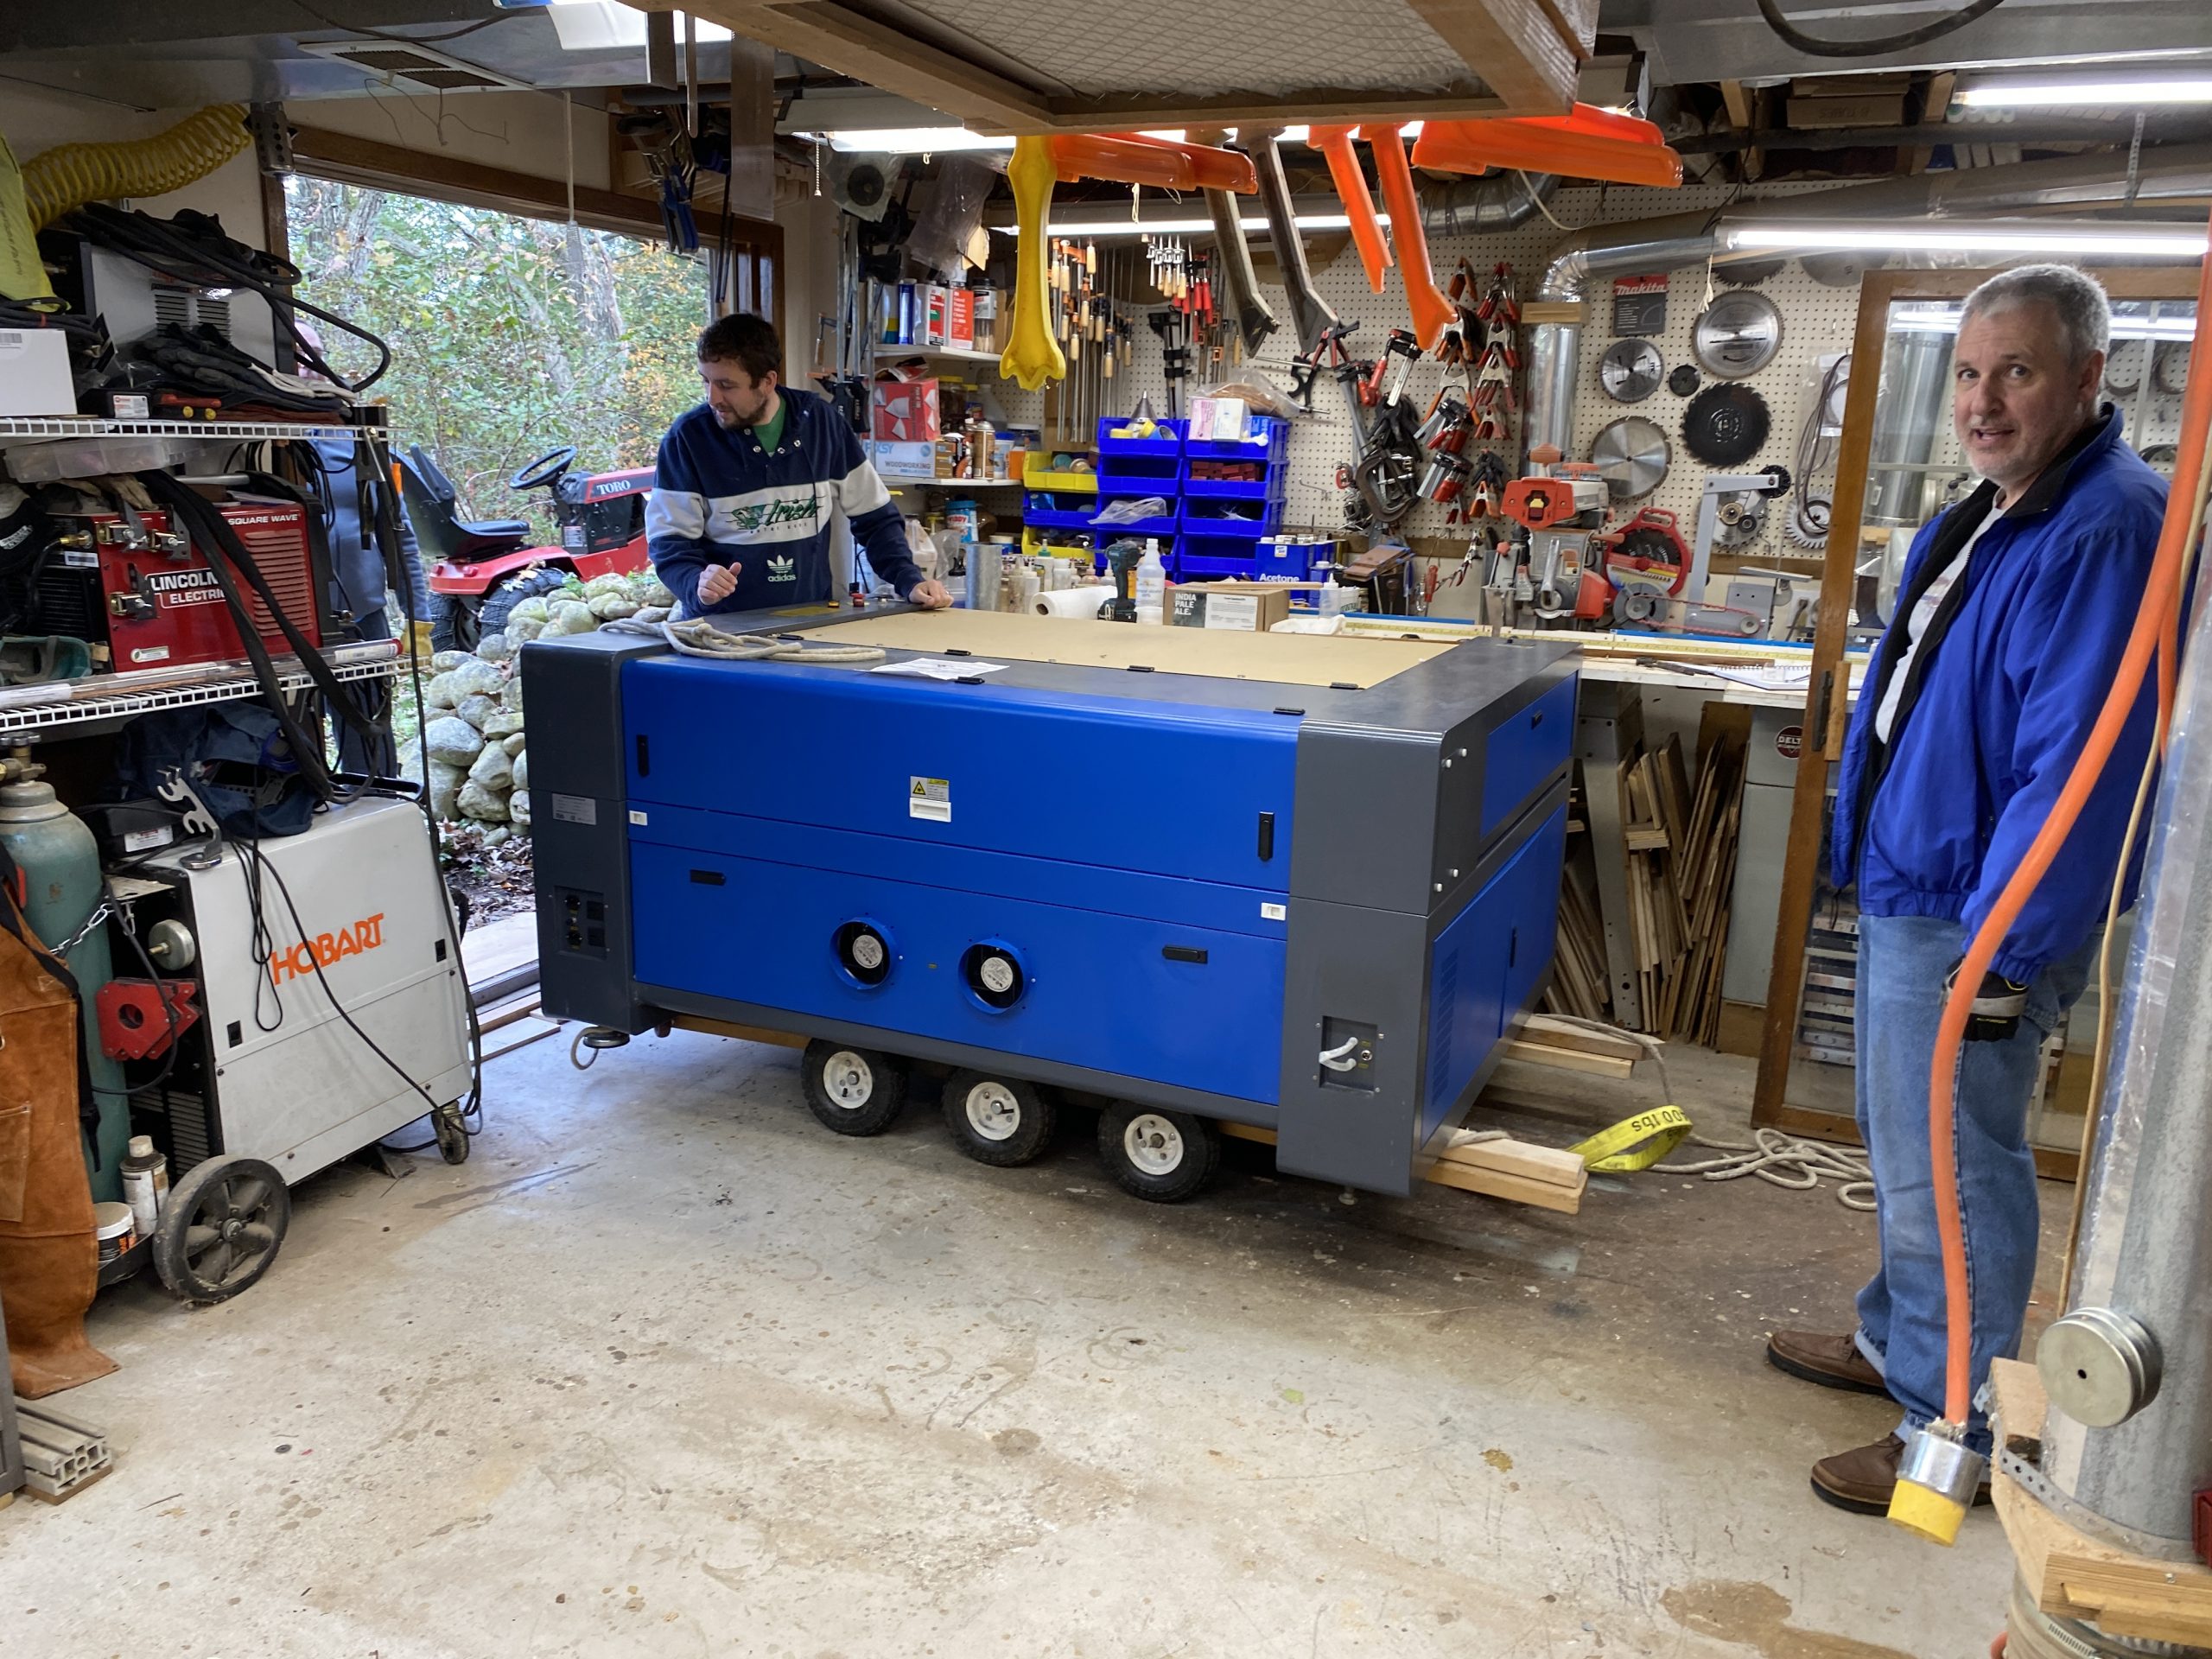
The garage is merely the staging place. The laser has to move to the basement shop. Fortunately, I have an exposed basement with a sliding patio door . So with both door panels out, there is plenty of width to get the laser in. When I brought in the metal lathe, I welded up a cart out of angle iron and used six 10″ tires from Harbor Freight (for load capacity and redundancy). That move is here: https://www.youtube.com/watch?v=Zsp6VVAqMf4 . When it was time for the Bridgeport mill (which has a wider base), the cart was cut apart and extensions welded and bolted into place. Now I needed it to be wider (again). So, at this point, it is starting to resemble cobbled together Swiss cheese. I also needed more length to get the support under the end panels of the laser chassis. Stacked 2×6 and 2x4s were used to get the length and clearance for the wheels. The width / spacing of the boards is such that they just slide between the casters of the laser.

Now it was time to raise the laser back up and slide the cart underneath.

The move
The move was almost anti-climactic. With the cart hooked up to the garden tractor and the crew ready to help, we drove it around the house and “pulled” it into the shop. I had the truck parked just below where we had to turn off the driveway onto the lawn to prevent a “runaway laser” (my nightmare). For much of the trip the crew was busy restraining / braking the cart on the downhill ride.

To get ready, for the laser the table saw and workbench were temporarily moved out of the way, the wood lathe was moved over a foot or so and other tools moved to new locations.
Once in the shop it was rolled into place, the exhaust ducting was mostly completed, water chiller hooked up and it was time for testing and alignment. Beam alignment which involves adjusting the angles on 3 mirrors to hit the lens and nozzle properly across the entire bed to took about 90 min. Some time was lost chasing an intermittent “machine protect error” that I will need to dig into later.

I was able to load the test file that was saved in the controller, plunk down a piece of oak, let it autofocus and burn the file.

It was a good end to the day. There is still of course more work to do: finalizing alignment and calibration, final exhaust hookups, automating the blower (so I don’t fill the shop with smoke again), air assist (to get rid of the residue on the surface), etc. Then the projects begin!