When we built the house I had a utility sink put in the basement shop. It has served well over the years but the lack of a counter-top and ugly old file cabinets for tool storage coupled with being a cold area in the winter due to the walls being half exposed, it was time for a remodel. This area is under our dinette. The space is also used for paint / finish storage, metal lathe and some lumber storage.
The new area had to have a large sink – big enough for brew kettles, fermenters and kegs. Dual faucets – one high reach for cleaning and a second with garden hose connection for an immersion cooler for brewing. Solid surface counter top and storage that looks nice were also required.
First step was to pull the sink, remove the old file cabinets and storage shelves. Next the two walls were covered with plastic vapor barrier, framed in, electrical roughed in, plumbing roughed in with the valves installed (needed to have the water back on), insulation installed and the dry wall done. Pretty basic stuff.
Now the fun began. The starting point was the sink, a 36″ Ruvati farm house stainless was ordered. A high arch Kohler faucet was found on sale and the Kohly utility sink faucet was ordered. FOr utility faucets, you need to check that they are NSF approved for drinking water – many are not. A trip to the Baraboo Habitat for Humanity Restore provided the quartz counter top pieces. Birch plywood was procured for the cabinetry and I had some maple lumber already on hand for the face frame and the edges of the planned shaker style doors and drawer faces.
Cabinet walls are 3/4 ” birch plywood. These were screwed and shimmed to the end walls and the intermediate pieces were placed to allow for a 5-6″ counter lip to the left of the sink and approximately equal sized ranks of drawers to the right of the sink.
Using pocket screws the assembly goes quickly. I just have the Kreg mini jig and their clamp (which is very nice). A few of the pocket holes had to be done with the jig held by hand. Using double stick carpet tape on the back of the jig helps tremendously.
First test with the sink. The braces need to be moved so that the sink ends up 1/4″ or so under the counter top to allow the top to be installed and pieces epoxied together. The braces are held up by blocks screwed to the cabinet sides. This allows for easy adjustment and is very secure without the need for fancy joinery. The braces rest on the blocks and have a couple of pocket screws to prevent twisting under load
The day I had to cut and polish the top and edges was miserable: 35 dropping to 31 degrees, drizzle turned to rain and then snow as I was outside wet sawing and wet grinding and polishing the edges. I came afterwards in a soaked and frozen popsicle. Paul came and helped lift the larger piece into place. The faucet and soap dispenser holes were cut in the back piece prior to installation. The 3 pieces were glued with thick 30 minute epoxy. Below you can see the counter top installed, glued in place. Next the top joints were ground and polished flush.
Next the sink was inserted (I could have left a bit more room). Clear silicone was applied to the top lip of the sink and then it was wedged upwards into position. The backsplash is made of marble mosaic tiles (another close out special). Marble has the advantage of having finished edges unlike many mosaic tiles.
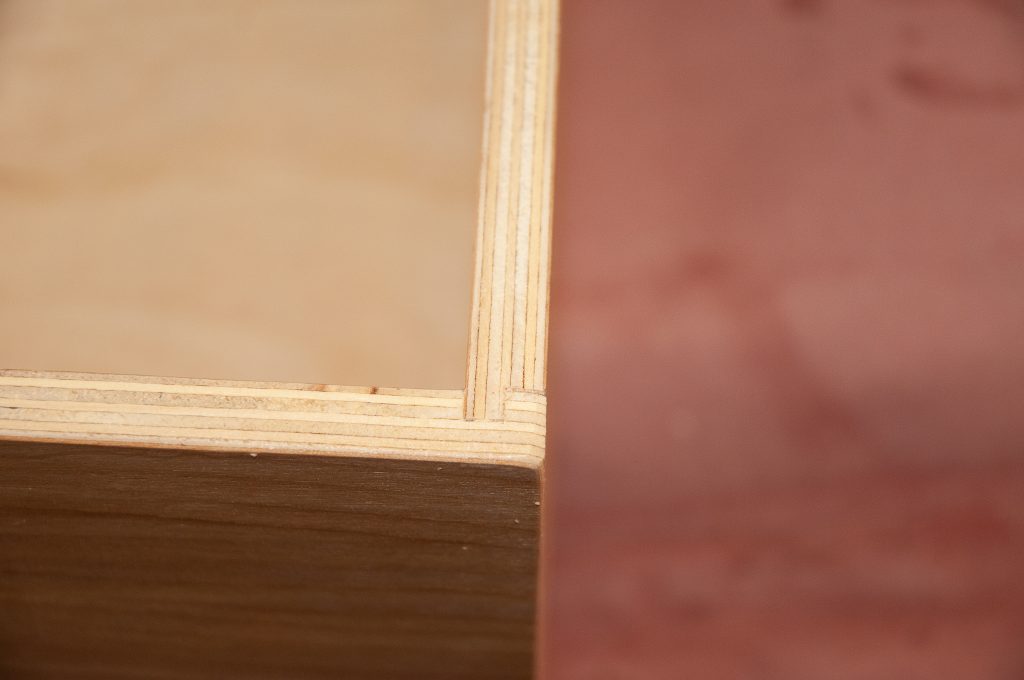
The drawers are simple plywood boxes with drawer lock joints. This is a fast, strong and easy way to make the drawers and all you need is a table saw. Below is a close up of one of the joints. 
The drawers are mounted to full extension K&V slides. I added spacer blocks on the inside of the cabinet so the slides would clear the face frame. This was far less expensive than the special face frame brackets for the slides would have been, plus I did not have a plywood back on the cabinets which is needed for the rear brackets if they are used. Drawers are 8, 10 and 11″ tall allowing room for power tool storage.
Shaker style doors are easy to make on the table saw. All of the pieces get a 3/8″ deep dado and the rails get 3/8″ tenons on the ends. The plywood panels are also glued in place in a few spots adding to the rigidity.

Finish is 3 coats of satin water based polyurethane that was brushed on. Tools are in the drawers and the space is ready for the next batch of beer.


