
You might think that “coloring the wood” is an odd phrase but in this project I am dealing with a notoriously difficult type of wood – Cherry. While lovely, cherry is notoriously difficult due to its problems: widely varying colors between planks, divergence of color in different planks as the wood ages, splotching with most stains, bleed back splotches when dyed. THis could be partly solved by getting a whole tree custom cut and dried, but what if that tree was still not the color you wanted – e.g. one of the very light variants, or had sapwood incursions that you wanted to hide, etc.
What I am doing, is using a variant of a finishing system I have been using for almost 20 years and it was taught to me by Jeff Jewitt of (homesteadfinishing.com) at a Wisconsin Woodworker’s Guild class almost 20 years ago. It uses a combination of dye to determine the base color, shellac as a sealer and light toner, gel stain to enhance the wood grain and then finally your top coats of choice.
When starting out to achieve a new wood color combination, I make a series of test panels to determine which dye color to use and dilution, shellac color, and which gel stain color(s) to use. I have built up a library of these for Oak, Ash and Maple, but did not have a sample set for Cherry. Additionally, the wood I bought has both very light and very dark heartwood and I would like to even it out. Plus, the Behlen Solarlux dye I had used in the past on Cherry was now discontinued.
To start, I ripped some scrap pieces of both the light and dark cherry and sanded it close to what I would do for the piece (yes there are still imperfections, but overall it is close). Then I dye each side of the panels. One side was Transtint Golden Brown and the other side Transtint Reddish Brown at the recommended dilution. Once this dried thoroughly I applied 2 wash coats of shellac per side Zinssner Seal Coat diluted 50% with alcohol on one side and Shellac Shack Ruby (~1.5lb cut) on the other. Once these dried I then masked off sections for each of the candidate gel stains. I tried General Finishes (GF) Georgian Cherry, GF CandleLight, and Minwax Cherry. The results at this stage are seen below:
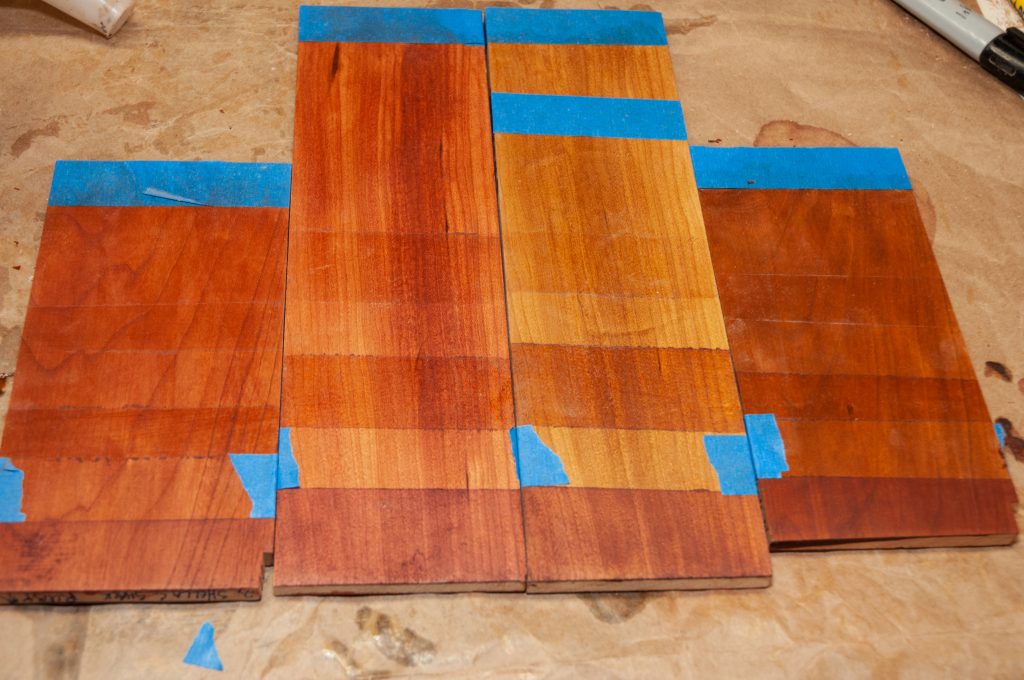
As you can see the left 2 planks are much closer in color – this was using the Reddish Brown dye. The right 2 planks did not pull together with the Golden Brown dye. This is the side with the Seal coat / blonde / amber shellac. The darker cross bands, from the bottom are: GF georgian Cherry, GF Candlelight, MW cherry. We decided to go with the Reddish Brown Dye, Ruby shellac and GF Georgian Cherry gel stain.
The parts were carefully sanded to 220 grit, vacuumed and tacked off. The dye and shellac were sprayed with DeVilbiss Plus HVLP gun and 1.2mm tip at 30-40 PSI which provided a very fine mist. Below you can see the pieces with the front 2 just having the dye applied. The back 2 have the first coat of shellac applied (and still wet).

It is very important to let the pieces dry thoroughly (1 hr in the winter) between coats) to avoid bleed back and splotching problems. With bleed back you spray or wipe on and everything looks OK< and then come back 15 minutes later and splotches have appeared as the finish dries and underlying finish or dye is wicked out of the pores. After the 2nd coat of shellac dries, the surfaces is thoroughly scuffed to full scratch (no shiny spots) with a maroon Scotch Brite pad. Using the Scotch Brite instead of the equivalent 320 grit sandpaper gives a better finish and GREATLY reduces the chance of sand throughs with the thin shellac layer. Next, the gel stain is wiped on and buffed lightly off.
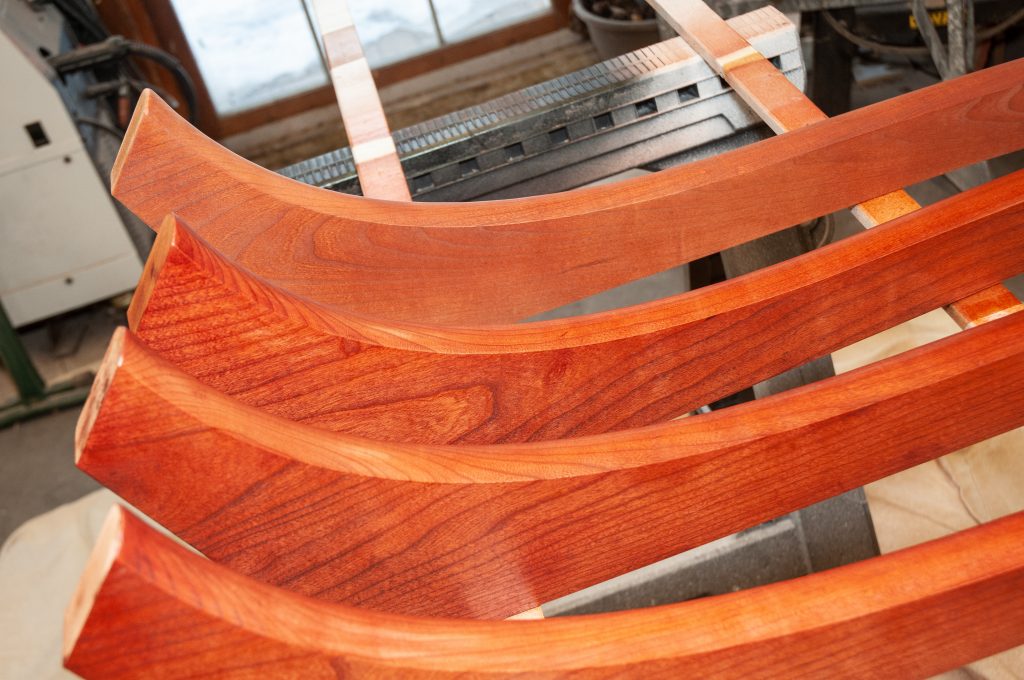
The gel stain really enhances the grain (and any errant scratches as well). While still wet it also gives you a good idea of the look of the final finish.
The complement to prefinishing the pieces prior to assembly is then to use a colored epoxy for the glue. In most cases – e.g. Craftsman Style Bed, Crib or Dressers, I will completely prefinish before glue up. In this case, as I want to use a water based finish, the oil based gel stain needs to dry for 2 weeks first, so I proceeded with glue up after letting the stain dry for a day (risking damage to the stain). The joints are taped off as part of dry fit assembly to ease clean up of excess epoxy. The epoxy is mixed up and then tinting powder and a couple of drops of the Transtint dye are added along with Colloidal silica. The Silica thickens the epoxy and lightens the color. The goal is to end up with the epoxy being the same hue but slightly darker than the finished wood. If it is lighter it sticks out like a sore thumb.

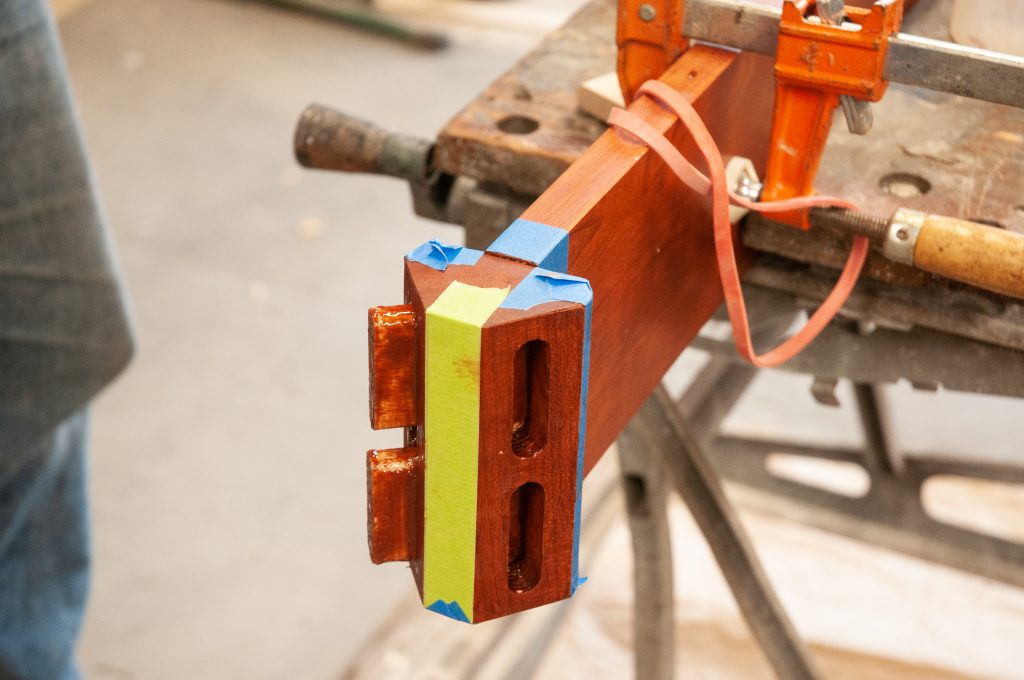
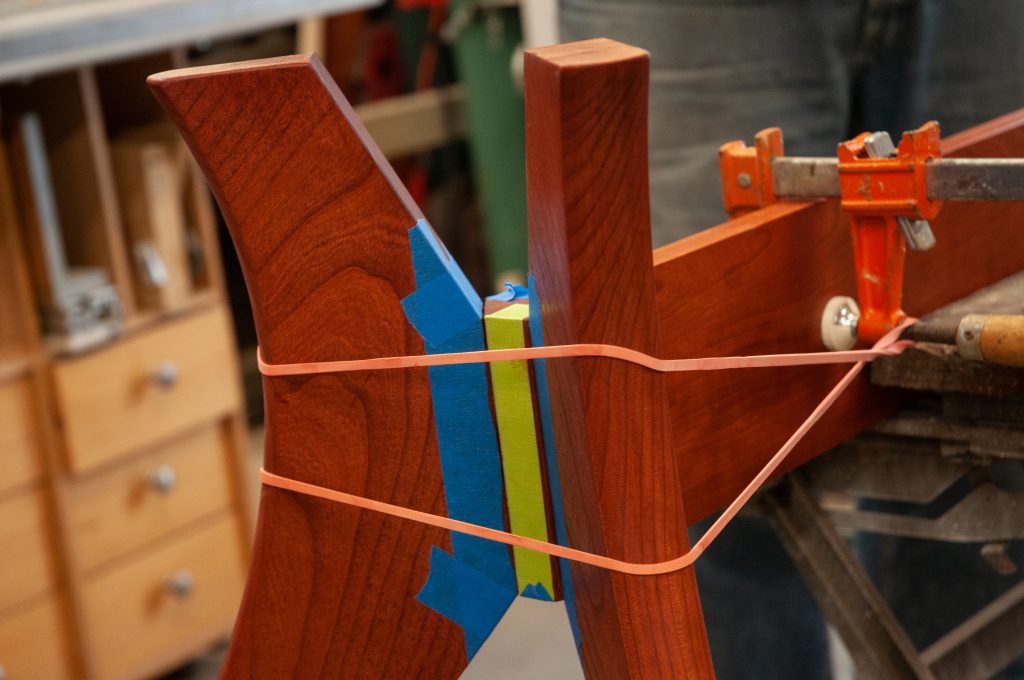
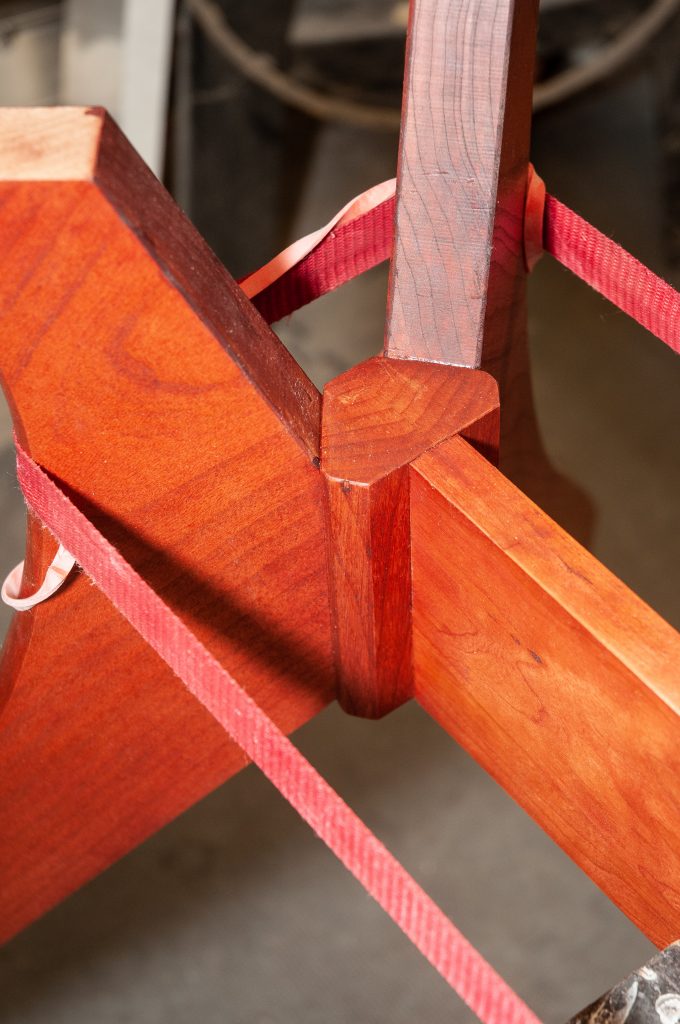
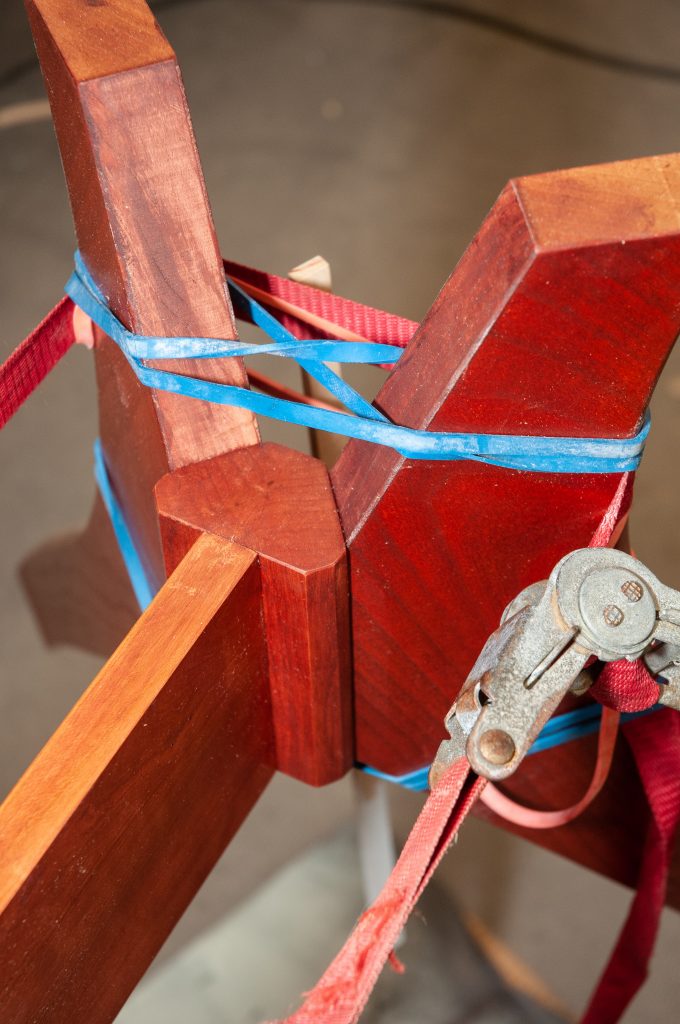
When using epoxy it is always a good idea to use gloves. I will often just use “Liquid Gloves” (Available at Ace Hardware). Clean up of the joints is done with paper towels lightly dampened with denatured alcohol. WHen clamping joints glued with epoxy you do not need (nor want) a lot of pressure, unlike the typical PVA glues. The strap clamp and big rubber bands (for trash can liners) provide plenty of clamping pressure. Consistent pressure is important. You don’t want to over tighten and loosen and have a glue starved joint.
I use West System Epoxy. In this case I used the fast hardener as well as the Colloidal Silica (I like the big tubs from System 3).
For an earlier and much more complex glue up of a King Sized Craftsman Style Bed headboard with nearly 80 pieces see: