My grand-daughter Amelia has grown to the point where she needs to move from crib to bed. Her new bed design is a blend of Isla’s Bed and her older sister Olivia’s bed. It retains the best points of both. Key points include:
- Platform bed with storage underneath like Olivia’s bed
- Short foot board to allow crawling over (which she is fond of doing with Olivia’s bed)
- Relatively short headboard so as to not excessively block the bedroom window
- Isla’s bed style 3 panel head and foot board design to simplify construction and make better use of material. All 3 panels can be cut from the width of a sheet of plywood with minimal waste.
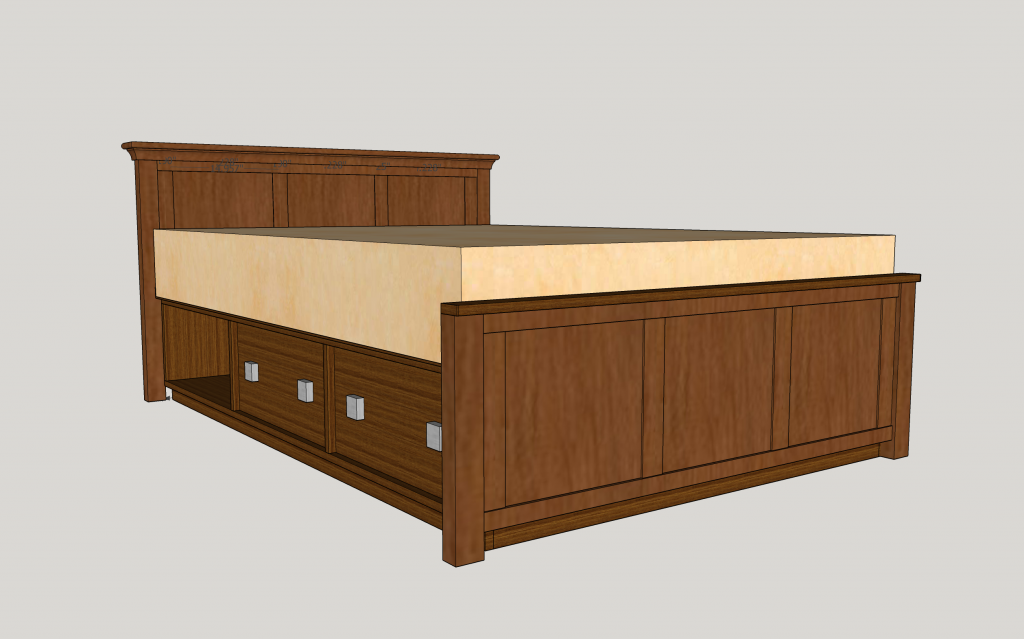
At this point, the final design of the top of the headboard is a bit up in the air. It may have the cap and cove molding like Isla’s as shown above, or may have an opening under the top cap and matching “posts” / dividers carried up from the panel section below.
This was done in Sketchup because I had used it for the prior designs. However, for all of my new work, I have switched over to Fusion 360. I would probably have been “time ahead” redoing it from scratch rather than struggling with the imprecision of Sketchup. I really like the easy ability to edit dimensions and add constraints in Fusion 360. This makes a big difference when dealing with multiples of the same component, such as the panels and the dividers of the head and foot board.
Rather than repeat all of the steps of the earlier project builds, I will concentrate on the major stages and some of the finer point of the construction.
This bed is being built from Red Oak, with Red Oak veneered MDF for the flat panels.
Construction
As before, I make use of mortise and tenon joints for the head and footboard outermost components. The dividers are set into dadoes in the cross rails and the panels are set into dadoes in the cross rails and dividers. This makes for strong construction and concealed joint edges. The vertical head and footboard posts are made form 8/4 stock, the cross rails from 6/4 stock and the dividers are from 4/4 stock. The end panels are 1/4″ nominal MDF core plywood. The mortise and tenon joints as well as the dadoes are all centered on the finished width of the wood. Having the varied thicknesses provides for interesting reveals / shadow lines. It also makes the final finish prep easier. All of the pieces are scraped or sanded to final finish surface prior to final assembly. This dramatically reduces the effort required to prep the surface for finishing. No flush joints to level out and no sanding into corners.
The sequence of events is:
- Mill the stock to each of the final thicknesses. Make sure to run all of the pieces of a given thickness together without readjusting the planer (or drum sander).
- Rip the pieces to final width. Crosscut to final length being sure to include the tenon ends in the length.
- Cut the mortises. In this case I used the bench top mortiser with a half inch bit. The fence was set to match the outside of the mortise. For the 1×1″ mortises, 2 plunges were required on each side. The workpiece was flipped for the second pair of plunges to finish the cut.
- Cut the tenons for the cross rails. As usual I did this with the radial arm saw and a stack dado set. These were cut slightly wide and then trimmed with a rabbet plane to final size. The scratch marks of the dado blade outer blades make for a nice reference when planing the tenons down. Some of the mortises have a slight taper to one of the sides. This is due to the bit deflecting inward on the second pair of cuts towards the openings left by the first pair. So care must be taken when trimming the tenons to allow for this taper and have the shoulders of the tenon meet flush and squarely with the legs.
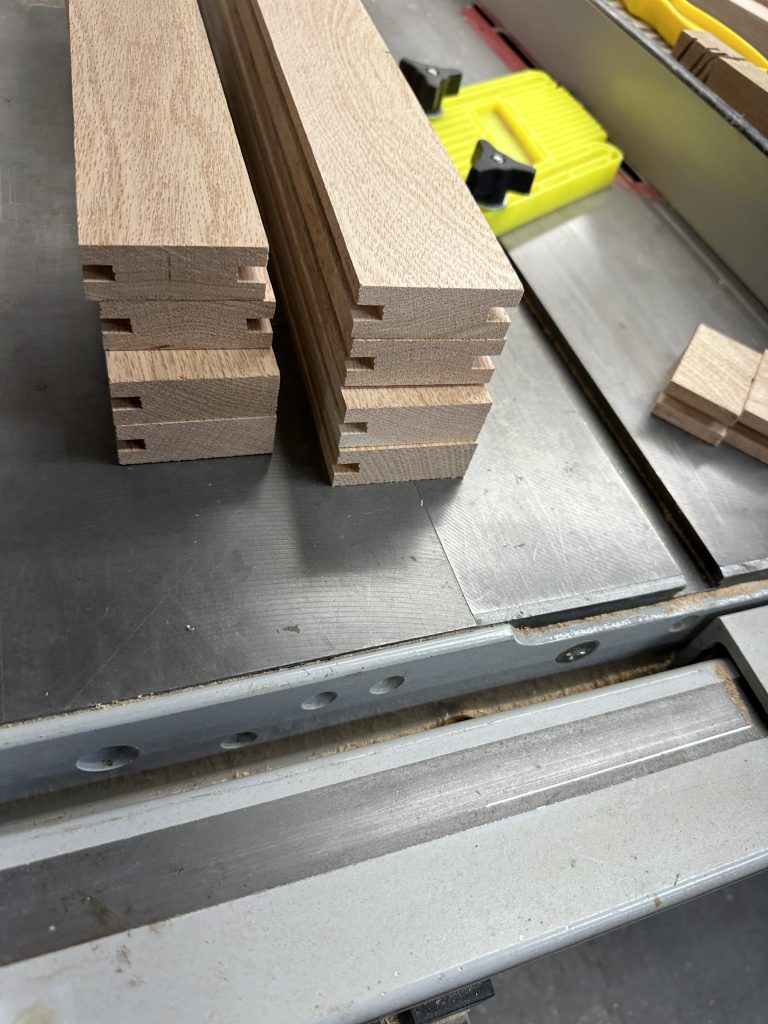
- Cut the dadoes on the table saw. Given that the plywood was just under 1/4″ thick, I could not use a dado blade. I used my standard blade (Forrest Woodworker II) and simply flipped the piece end for end to make the second cut to finish the dado. When cutting the dadoes. I set the fence to have the blade cut towards the center (thin outside towards the fence). This setup means that if the piece is slightly bowed / warped, the dado will become slightly wider. This is largely controlled by use of a stiff feather board pressing the stock against the fence. However, there will still be some variation. I find having the cut be slightly wide is better to deal with than slightly narrow and having to tediously trim the sides of the dado with a specialty hand plane.
- Cut the tenons for the dividers on the radial arm saw. I made the tenons fit as closely as possible. When sneaking up on the final depth of the cut, I stopped adjusting the height of the radial arm saw and switched to shimming with blue masking tape under the end being cut. This allows for fine adjustment of the depth of cut and avoids some of hand plane work to get the correct fit.


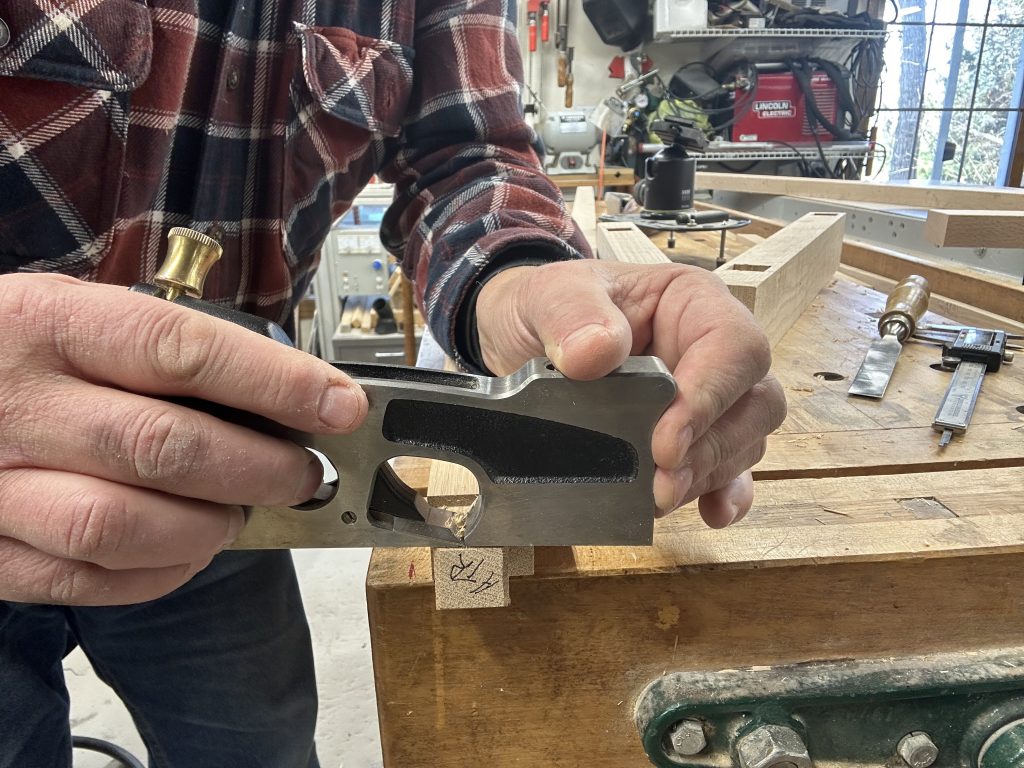
There is always hand work required for tenons to get a smooth sliding fit. The cross rail tenons are set just barely snug. Even though the shoulder plane is not very large, I still use it 2 handed. My left forearm is resting on the cross rail and both hands are used to keep the plane level with respect to the rail. It is all to easy to accidentally taper the tenons, especially on narrow (1″) ones like these. As part of the fitting, I clearly mark where each piece is uses. This greatly helps when doing the final glue-up under the pressure of the limited glue “open time” and the many joints that must be done at once. For beds I reference right and left as facing it from the foot end.
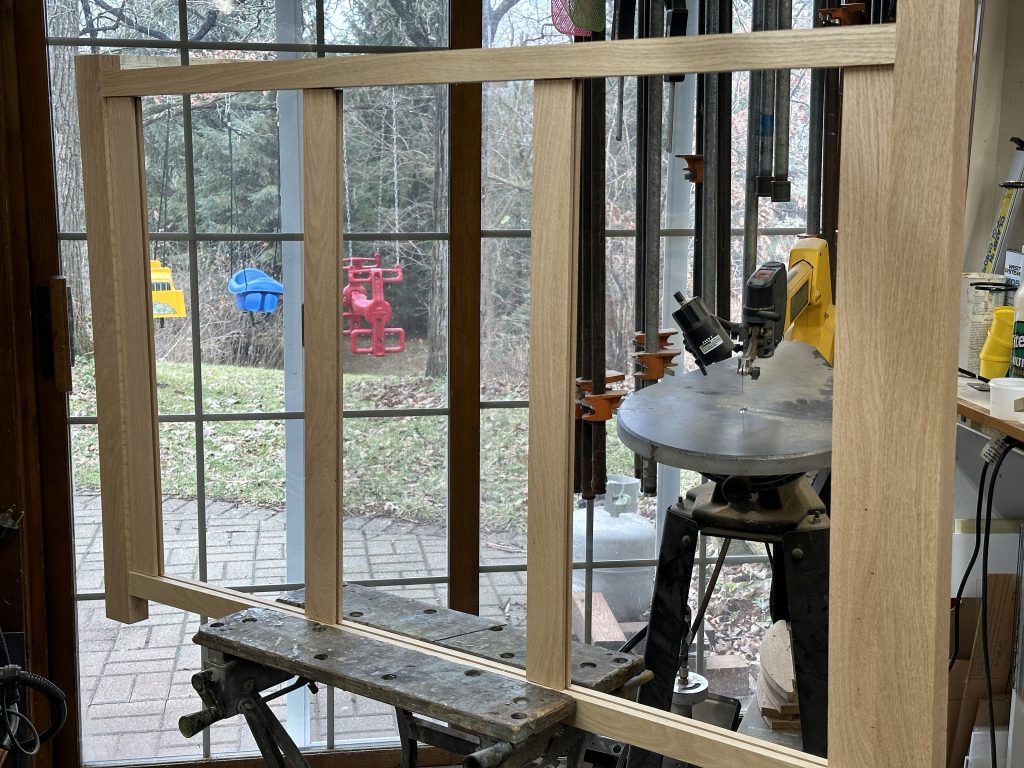
When assembling head and foot boards, I find a Workmate to be invaluable. I clamp the lower cross rail in it and then start to work upwards as I either test fit the pieces or for final assembly. I probably dry fit the had and foot board 3-5 times each as I fine tune the fit of the tenons and the panels. Below is the headboard being dry assembled prior to cutting the plywood panels.

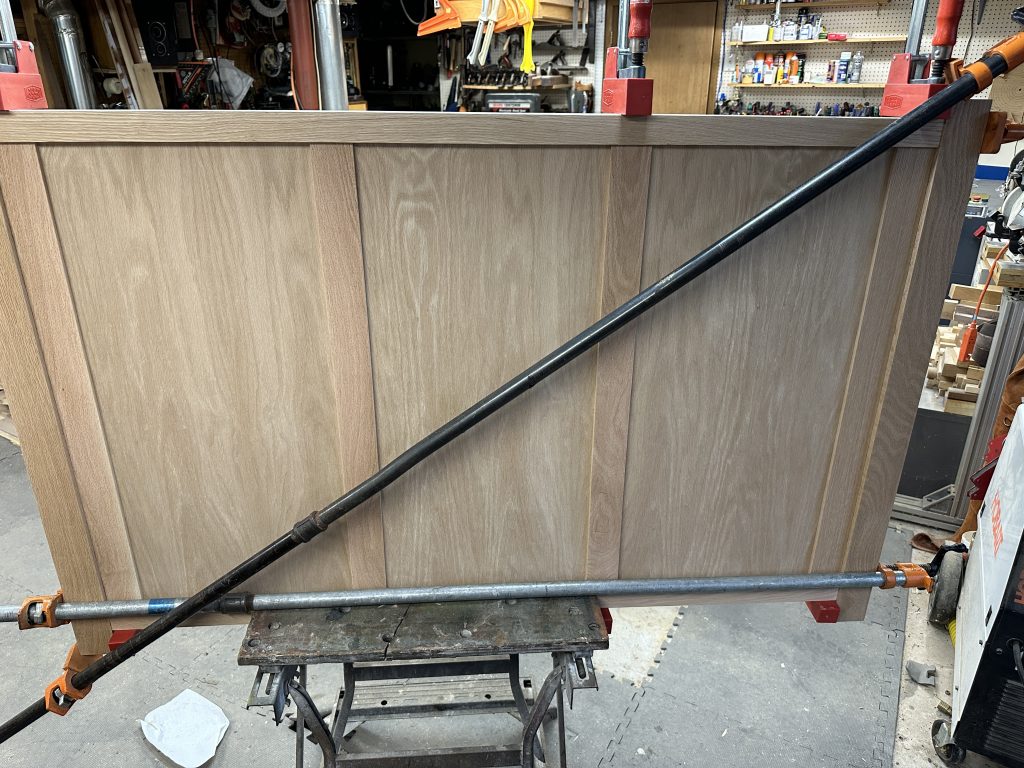
One of the big advantages of doing the final glue up in the workmate rather than on the bench or on the floor is that there is easy access to add a diagonal clamp if one is necessary to true up an out of square assembly. For beds, I need to break out the pipe clamps and couple them together to get the needed length. Normally I alternate the clamp placement on each side as seen for the top and bottom pipe clamps. However the middle vertical K-body clamp had to be reversed to make clearance for the diagonal pipe clamp.
Next, I will start on the platform / pedestal cases.
