Some of you may be wondering why there was such a delay in getting to the end. Besides other projects getting in the way, the finishing takes a long time and fills the shop.
Finishing schedule:
- Sand to 220 grit with random orbit and then hand sand 220 grit with the grain to remove any “swirliques”
- 2 coats Reddish brown trans tint dye sprayed
- 2 light coats ruby shellac
- General Finishes Georgian Cherry Gel stain – hand wiped
- Let dry 2 weeks
- Light full scratch rub out with maroon Scotch Brite pads
- 2 coats General Finishes Endurovar – glossy – sprayed
- Full scratch hand sanding with 220 grit
- 2 coats General Finishes Clear Poly Satin – sprayed
- Full scratch hand sand with 320 grit
- Re-vacuum shop and change filters in the ceiling dust collector / air circulator. Wipe down with clean dish towels and alcohol – twice.
- 1 coat General Finishes Clear Poly Satin
- Let dry 2 weeks prior to assembly

Table top and frame components after the first coat of Endurovar
The frame provides the support for the top leaves and rests on top of the legs. This replaces what would be the “skirt” in a conventional 4 leg table.
The frame components include:
- Cross bars which rest on the legs and carry the longitudinal frame pieces
- Inner frame – this supports the slides for the end leaves as well as the tube hinge for the butterfly leaf
- Leaf extension rails – These are mounted to the slides and to which the two end leves are fastened
- Side rails – These provide the decorative edge of the table frame and also support the pulleys for the cable mechanism which is used to “equalize” the motion of the 2 end leaves. It also provides support for the top, notably the butterfly leaves when extended


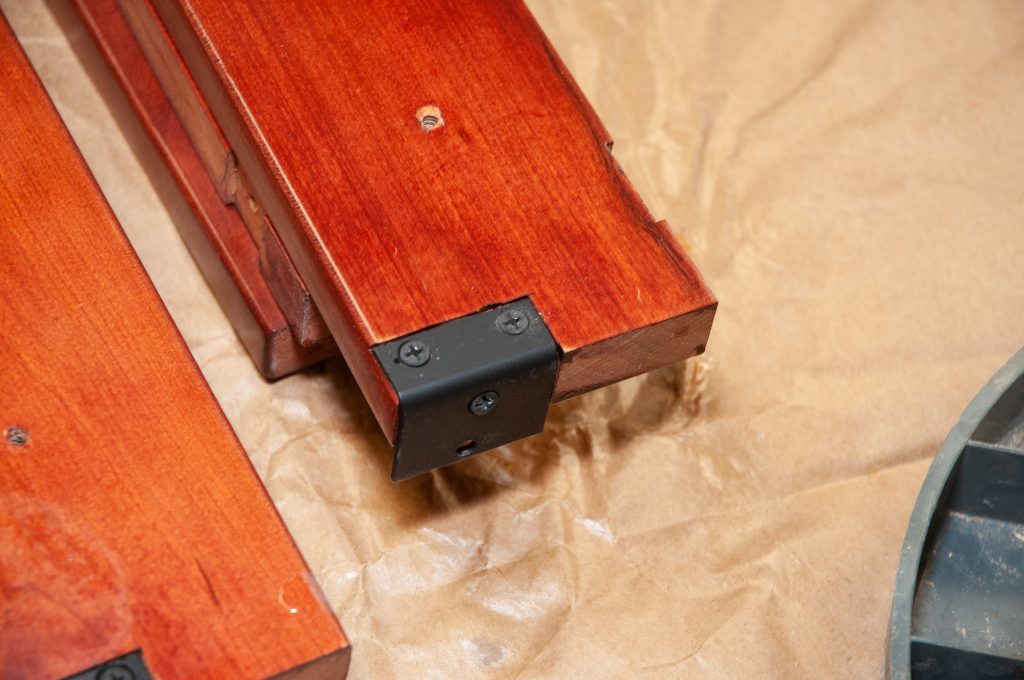
The leaf slide rails are mounted to the slides. Note that the rails must be raised slightly above the stationary portion of the frame so that the underside of the top does not rub or drag on the stationary frame. One credit card or hotel room key card thickness is sufficient.

Once the leaf slide rails are mounted to the slides, the figure 8 tabs that hold the top to the rail are added. Note that since this is being done during the winter the outer figure 8 tab ears are angled inward to wards the center of each rail / leaf. The assumption being that the wood is fully dry now and will expand in the summer and the figure 8s will then allow it to move outwards at the ends. What is not visible is 2 pocket screw holes about 1/3 of the way form the center of the table in each leaf rail that will fix the position of the leaf relative to the leaf slides.

At the ends of the leaf slide rails there are small angle brackets that will be used to fasten the aircraft cable to the leaf slides. This is for the expanding compensating mechanism so that both leaves open at the same time.

