The wood was broken down into usable lengths, run through the jointer with the power feeder and then planed. It became evident that there was an almost even split of “light” and “dark” cherry pieces. So the next step was sorting them out. Teal had asked for a lighter top and at one point we were considering hard maple. So, the light pieces were selected and then further sorted and matched for the top panels.
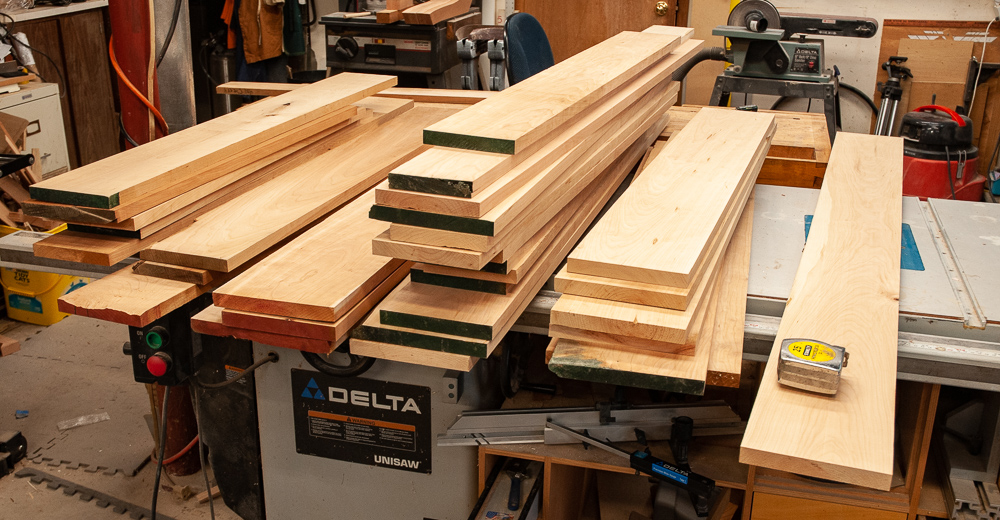
As you might expect some were rejected for use in the top, due to bad imperfections (tear out, knots in the middle, etc). The rest were matched up and the edges jointed, as well as being ripped to maximum usable width per piece. This machining / matching / culling continued for a few rounds until I had what looked like enough boards for the 3 major panels for the top. The 2 end panels are about 36″ wide and the center about 24″ wide. The pieces were then cut to rough length – 44.5″ to allow for trimming and removal of the hard to eliminate jointer snipe at the end of the cut. Note that some sources say that adjusting the outfeed table of the jointer can eliminate snipe, but this is wrong. The goal of the outfeed table height vs cutter blade height adjustment is to have a straight edge. Matching the outfeed table to the highest point of the arc of the cutter knife is key to straight edges and the first phase of a good glue up. However, it does not always eliminate snipe whether on my previous 6″ jointer or my current 135 year old 16″ Colladay monster of a jointer.
After jointing, ripping and frequently jointing the ripped edges, lay the boards out for best grain and color match as well as trying to alternate the ring direction if possible. Mark across all of the faces, across the grain, in pencil with a large V or Triangle. Th is is to keep the pieces in order and reduce the chance of an unplanned flip of a board during planing or glue up. The the next step is to fine tune the edges with a hand plane. Yes, you will find claims of “glue line ” rip blades but this does not work reliably for much more than 20-24 inches. Wider pieces benefit immensely from (optionally) running on the jointer and hand planing for a perfect fit and invisible glue line. When hand planing for final fit you want a #4 to #6 plane. My favorite is a Veritas low angle jack rabbet plane set for a very fine .002-.006″ translucent shaving across the width of the blade. Yes, this is 1/2 to 2 sheets of paper thickness. The regular low angle jack would work as well, but I can only afford one of these, and this one is also great for truing up tenons as well.
Next best choice for a plane is typically a old Stanley or Record #5 or #6 with the frog moved up and the mouth set very tight. Having an even shaving across the width of the blade is very important. The goal is to remove the “hills” from the joint without adding any new slopes and gaps across the width of the joint or inducing tear-out. A firm, steady stroke, evenly applied across the width of the board is required. It usually takes a few tries to get a perfect fit. I do prefer to sneak up on the fit rather than risking a bad gouge and tearout. Being able to have finely set planes for this sort of joinery and others for regular “rough” planing is reason enough to have 2 of each size for your favorites (typ. $35-55 each at flea market, garage sale or ebay).
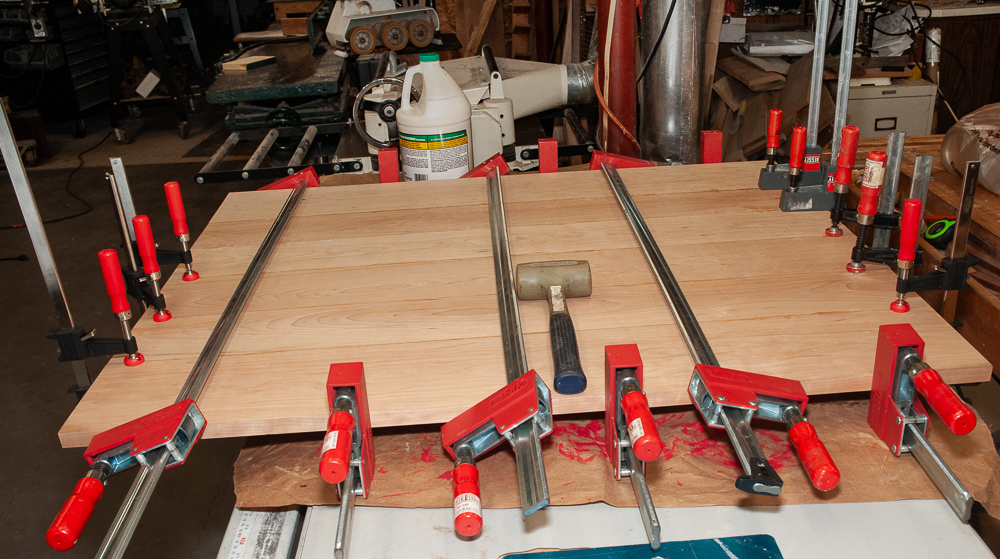
Once the joints are good, now is the time for the glue up. I prefer Titebond III as my go to glue. Not only is it water proof, it offers a few minutes more working time than Titebond II or ordinary PVA such as Elmer’s. For the bottom clamps, Bessey K body or the Jorgensen equivalent are ideal (but 3/4″pipe clamps will work too). You will need a large flat work surface and the best I have is the tablesaw for pieces this size (~36×44″). Apply the glue evenly to each side of each joint and then just barely tighten the boards in the clamps. Next place clamps vertically across each joint – not super tight yet. This will hold the ends in alignment. Working across the glue up, even up the middle of the boards, pounding form the top or pressing up from the bottom and then tightening the clamps a bit more. Once the board edges are even it is time to place the alternating top clamps. Now work your way around and progressively tighten the clamps and keep checking the joint alignment and tapping or pounding the high boards into submission. If you wonder why there are top and bottom clamps you have probably not yet seen a “board fountain” when clamping from only one side, and then while tightening, the whole thing sort of explodes upwards due to the clamp bars curving under pressure. Ideally, you want to be able to run your finger across a joint and not feel it. A bit of care now will save a lot of planing and scraping exercise later. Flattening a table top by hand can count as aerobic exercise!
Next, will be cleaning up the top panel joint lines as well as starting on the base / leg joinery.