Completion and Finishing Touches
Final Drawer Alignment
The drawers are inset by 1/8″. This is done by having them held in place with squares as shown or a wooden jig. It is important to have both front corners held in place at once as it is very easy to accidentally move the drawer while gluing and pinning the stop blocks in from the back.  I prefer to use pins rather than brads to secure the blocks while the glue dries. The blocks are rather small and brads will often cause them to split. I also typically use thick superglue for this step.
Hardware installation
When marking the drawers for the hardware you can either make dedicated jigs or mark each drawer. For this I use masking tape and a fine point Sharpie. The reason for the sharpie is that no pressure is required and there is not a chance of a line telegraphing through the tape into the finish as with a pencil, especially for softer woods. Also if there is an errant mark on the drawer from the Sharpie, it is easily removed with xylene and does not harm the finish.
Note that I have also placed marks on the square so I have a firm reference and avoid mistakes. For the vertical alignment I run the marker along with a square set to the correct distance from the bottom of the drawer- direct transfer rather than more measuring.
Each of the kids wanted a different style of hardware. Jessie selected glass knobs. These have screws permanently attached which are too long. Rather than measuring and marking each one individually, I made the spacer block shown below. This made the cutting much easier and helped prevent them from turning while cutting on the bandsaw. I plan to use this trick when cutting other screws on the bandsaw in the future.

Backs
The backs are covered with 1/4″ plywood. The oak plywood shown was actually quite reasonable.
The notches in the back are hand holds. They line up with the bottom of the 2nd row of drawer supports. Each is about 1.5×5″. This makes moving the dressers much easier, especially up and down stairs.
Tops
The tops are screwed on from below with #10 1 1/4″ flat head screws run up through the front and back rails.
Front Leveling Feet
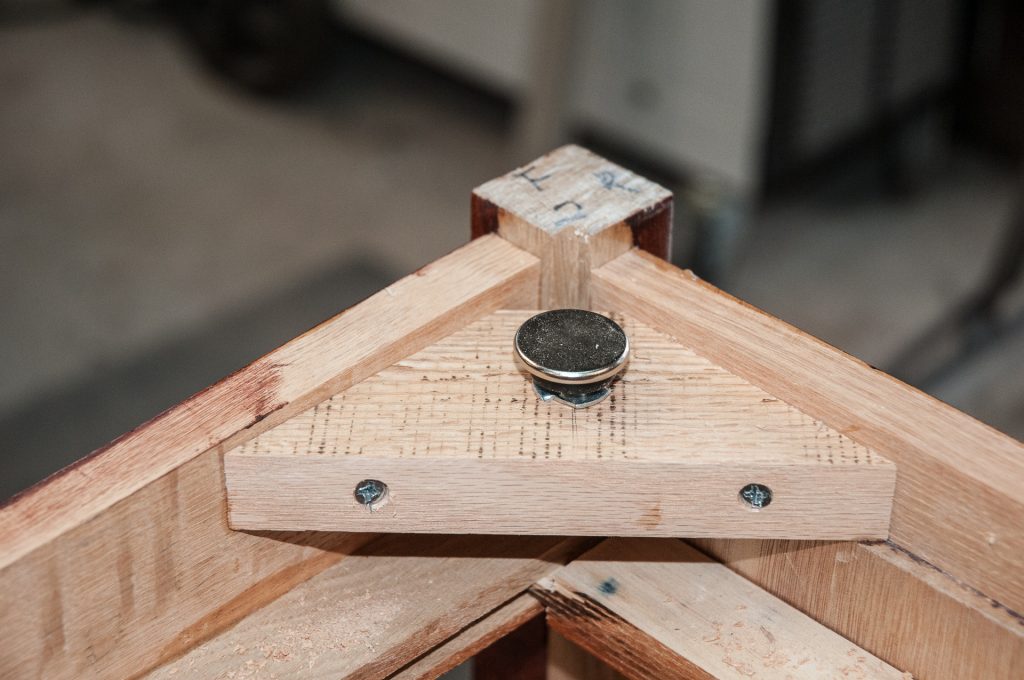
When placing dressers against the wall on carpeting, they will typically lean forward. This is due to the rear feet being on the perimeter tack strip under the carpet. Adding screw in leveling feet in the front corners allows you to then raise the front until the back is again parallel to the wall.
Final results
Jessie’s
Elyse’s
Actually it is for Sawyer’s room. He sure seems pleased.


David’s
In this shot I am still waiting for the rest of the handles and next time I need to remember to dust before shooting photos.
Finished!
This has been quite the project and it is nice to have it completed. Now I just have 2 more deliveries to do and then straighten up the shop for the next project.


