I have been wanting to get into making fermented sausages such as Sopressata, Pepperoni, Salami and more. My sausage making has been rather limited as Teal is not a big fan of “tubular food” and each time I made sausage (summer, brats, Italians, etc.) it in the past it was painfully slow , so the gear would get set aside for another year or 2. I have both the meat grinder attachment for the Kitchenaid and a Kitchener #10 hand crank grinder. Both are slow to use.
Recently, I was making Sopressata with help from my grandson. However grinding in the hand crank grinder was too much for him this time. However he is a fan of the sausage samples we fried up and commercially made Soppressata.
Even for me it was difficult with the grinder constantly slipping on the counter and the blade and disc/plate getting gunked up. After grinding, I gave up on the hand grinder for stuffing and used the Kitchenaid (slow going). Stewing on this for few days, I was thinking whether I had to get a new grinder and stuffer or does the existing gear just need a tune up? The clue I needed was one of the grinder vendors recommending to send the blades in to them for periodic sharpening. I thought, this would be simple to do myself and then the light bulb came on: I had not done anything with either of the meat grinders! Basically, I was just using them “out of the box”. It appears that this is the primary problem!
I tune up and sharpen all of my knives and hand tools (chisels, planes, jointer, planer, etc). on a regular basis.When I get a new (or new to me- used) plane or chisel I spend the time to flatten and tune up the new tool. On closer examination of the Kitchener meat grinder there is a list of problems:
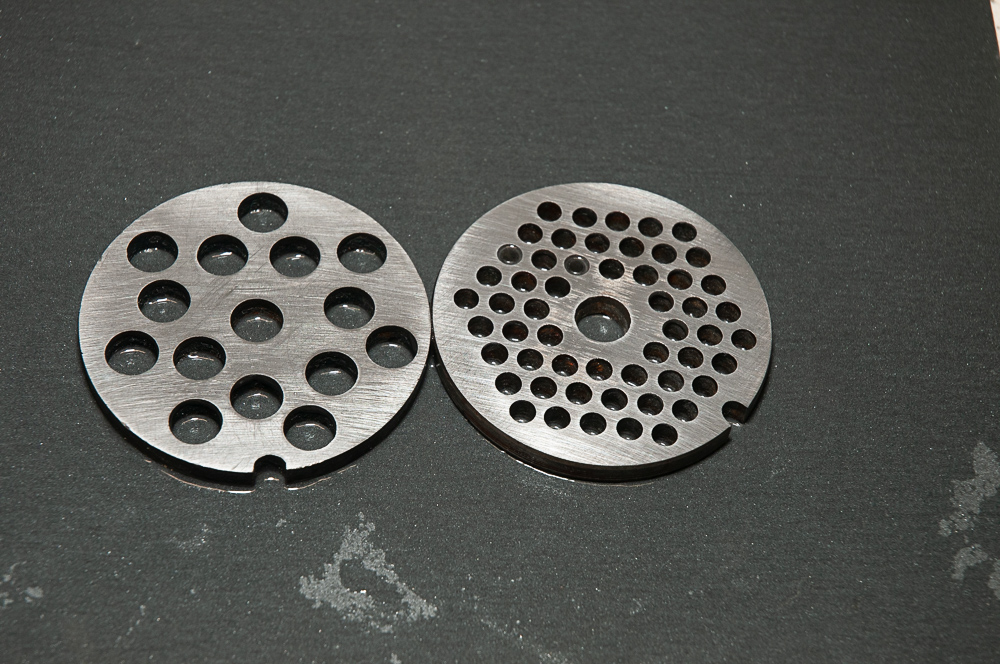
- The discs / plates are not flat. Actually both are concave on both sides (how this would happen I do not know). They are not worn by any means, just poorly manufactured. You can see the coarse factory grind marks and no real sign of wear from use.
- The knife is far from sharp
- The plastic spacer they provide to go between the feet and the counter is some sort of polyethylene – slippery. We need something that will grab.
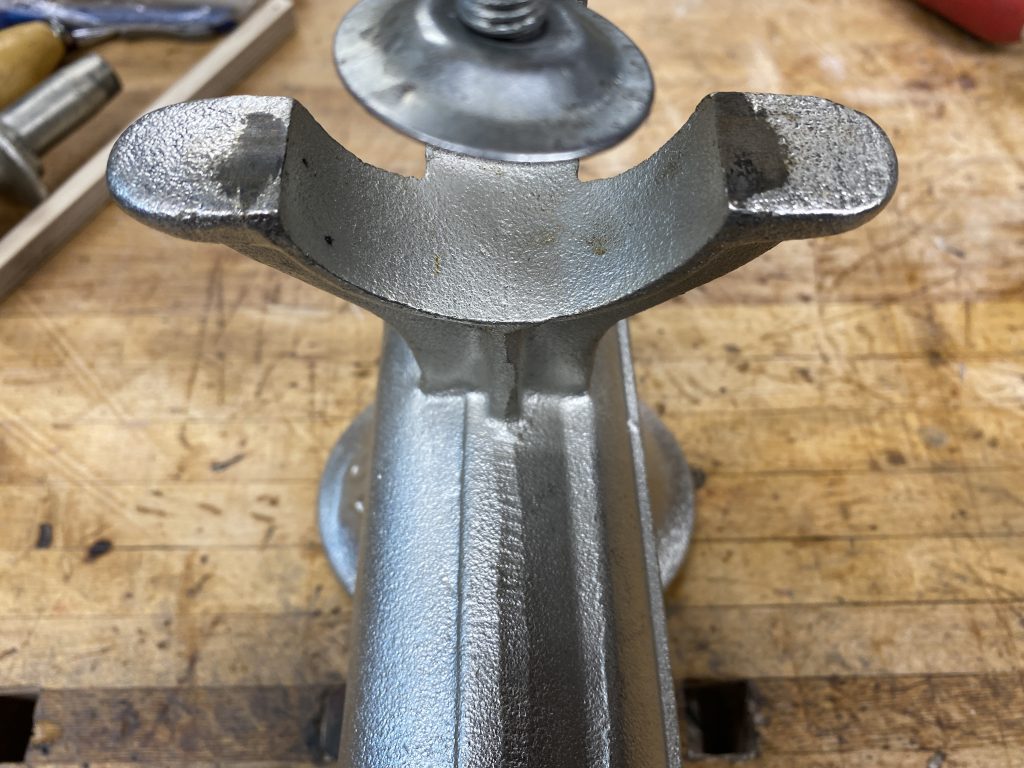
- The feet are far from flat and have a very limited contact patch near the inner corners. This can be seen in the photos with the 2 small wear areas.
- On the plus side the rear plastic bearing has a reasonable fit and enough thickness to push the blade against the plate.
The first step was flattening of the plates. You can use diamond stones 180 grit and then 300 or silicon carbide (wet or dry) sandpaper on the countertop (or glass plate or table saw or jointer) as shown below. Just wet the sandpaper on both sides and it will stick sufficiently for the flattening. If doing this on the counter, stay away from the front edge which may have some dish to it. It may take 20-30 min to do the initial flattening if they are poorly made (as mine were). However, subsequent sharpenings take but a few minutes.


With the plates flattened, now it is time to sharpen the blade. For this you need something that can reach all the way into the corners. The diamond plates work well or you can use inexpensive small diamond sharpeners (often sold for sharpening fishing lures) . Aggressively sharpen the bevels, then do the flats the same way as the discs. It now actually feels sharp. So now this is getting promising.
Next was to address why does the grinder slip so badly on the counter? I threw out the stupid polyethylene spacer (which is slippery) that came with the grinder and used a rubber pad of the type for opening stuck jar lids, but this still did not help a lot. Looking more closely I noticed that there are 2 very small wear / contact points on the feet. They are FAR from level.

The feet need flattening. Given that this is cast iron, a file will do. Use a 10 or 12″ mill bastard file and carefully file the 2 feet flat. You must make nice parallel strokes or you can easily end up rounding the feet rather than flattening. Check that they are flat with a straight edge such as the blade of a square.

When researching other grinders, I saw the LEM #10 had a plastic/ rubber boot over the feet. This makes a lot of sense. So I drew up the foot and clamp pads in Sketchup and then 3D printed them in TPU (Thermoplastic Urethane) which is a flexible filament. I am using EOLAS brand TPU+, one of the softer ones for the foot and clamp pad, which they also claim is food safe (also great for gaskets).

With these changes in place, the grinder works far, far better. It grinds much more easily, does not clog as often, and no longer slides on the edge of the counter at all. I am still thinking about a proper sausage stuffer however.
The sketchup and STL files for the pads and a stuffing spider are at: https://www.thingiverse.com/thing:4695351