With each cut in a given piece of wood, it becomes “more expensive”. In some cases, simply making a few spares for test cuts and to replace a damaged piece will work. In other cases, such as this bed, there are not good substitutes, are the pieces were chosen to have matching grain and in most cases, a given set of components were sawn from single planks of wood (arches, legs, stretchers). This set of tips concentrates on minimizing the chance for errors destroying a partially completed piece
Centered Dadoes
The bed panels are placed in 1/2″ deep dadoes in the components (legs, stretchers, vertical dividers). The pieces were of 3 different thicknesses to add reveals and avoid flush sanding. As I laid it out, the components were all centered, including the dadoes. So, this simplifies the layout but does require that all of the mortises, tenons and dadoes align perfectly in order for the panels to fit well.
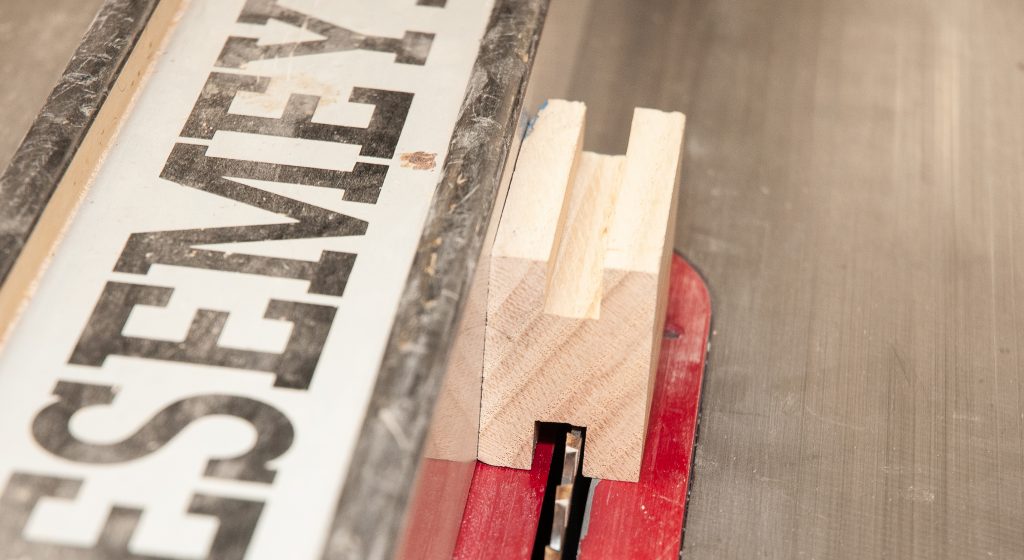
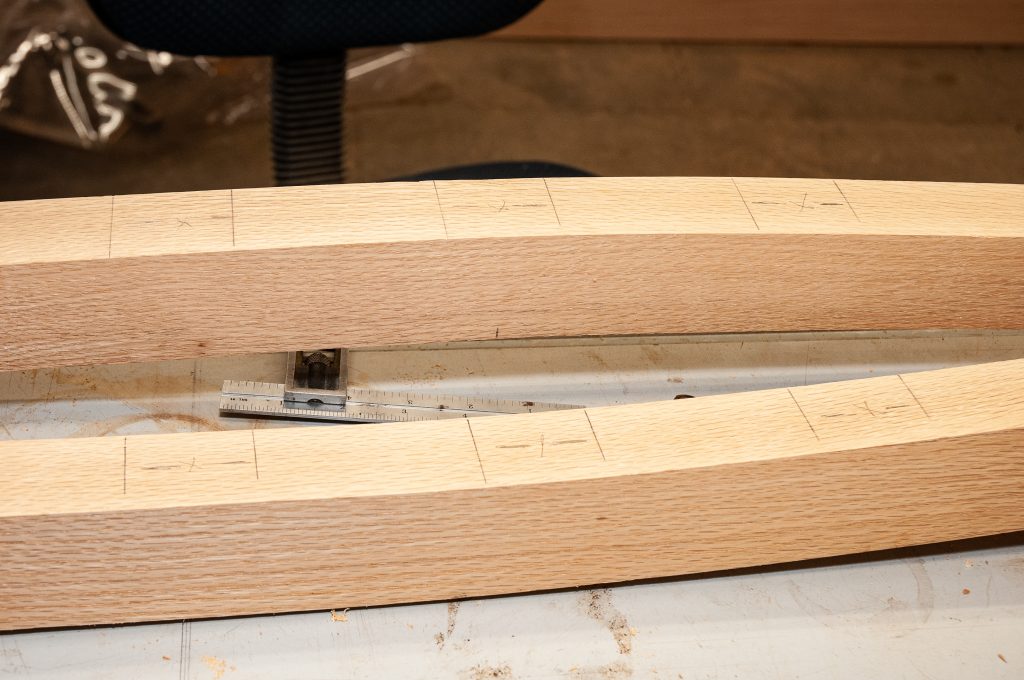
I find that it is easiest to make half of the dado or mortise from one side flip the piece and complete it from the other side. This way the cuts are centered. However, it is abit more finicky to set for width as every change that is made to the fence is doubled in the cut. Additionally, the stock I have is not perfectly straight, with the stretchers across the headboard ending up with almost 1/8″ of bow as the wood relaxed after cutting. While this in of itself, will not be visible in the finished piece, it does make cutting the dado more difficult and highlights one of the choices for setup.
When cutting the centered dadoes, the blade should be cutting on the side AWAY from the fence as shown above. This way, if the stock bows slightly or the operator lurches and lets the stock move away from the fence, the error in the cut is directed towards the center of the dado rather than making an unsightly gouge on the outer edge. This allows for a second (or third) pass, to clean up the joint or to use a hand plane to do the final adjustments as shown below. When cutting the dadoes I typically use a single blade for 1/4″ grooves and a dado blade (wobbler or stack) for wider grooves. Just be sure to set the width of the cut to only about 2/3 of the width of the final groove width to allow for the 2nd cut to make the centered groove and leave room for errors without gouging the cut too wide.
 I really like the Veritas Side Rabbet Plane shown above. It is far superior to the other two that I own (a Stanley and a Wood River).
Routed dadoes for decorative spindles
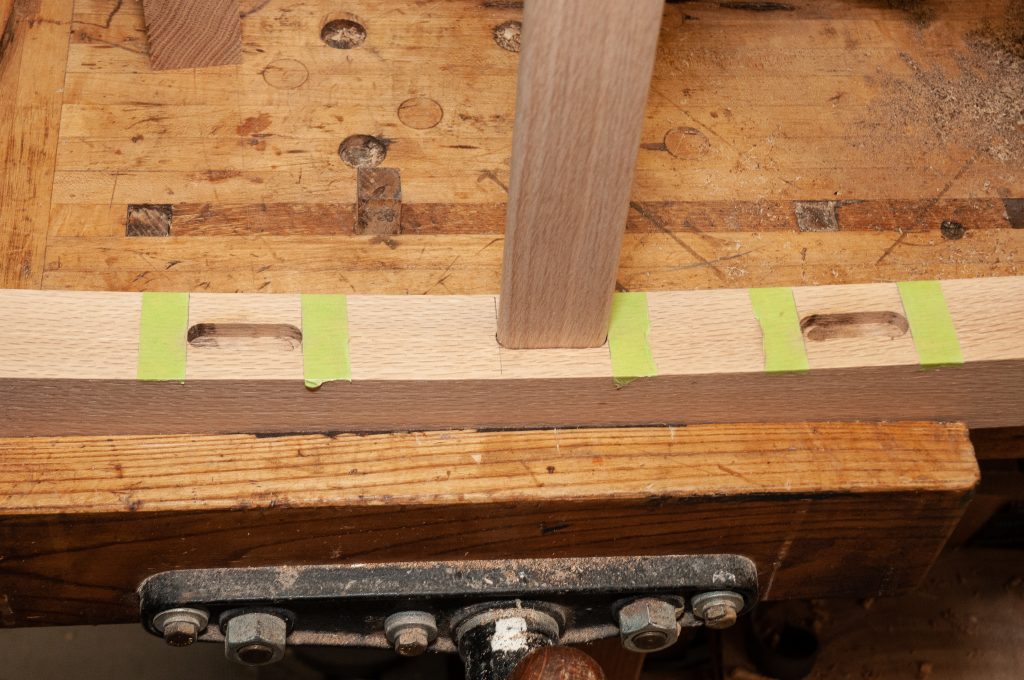
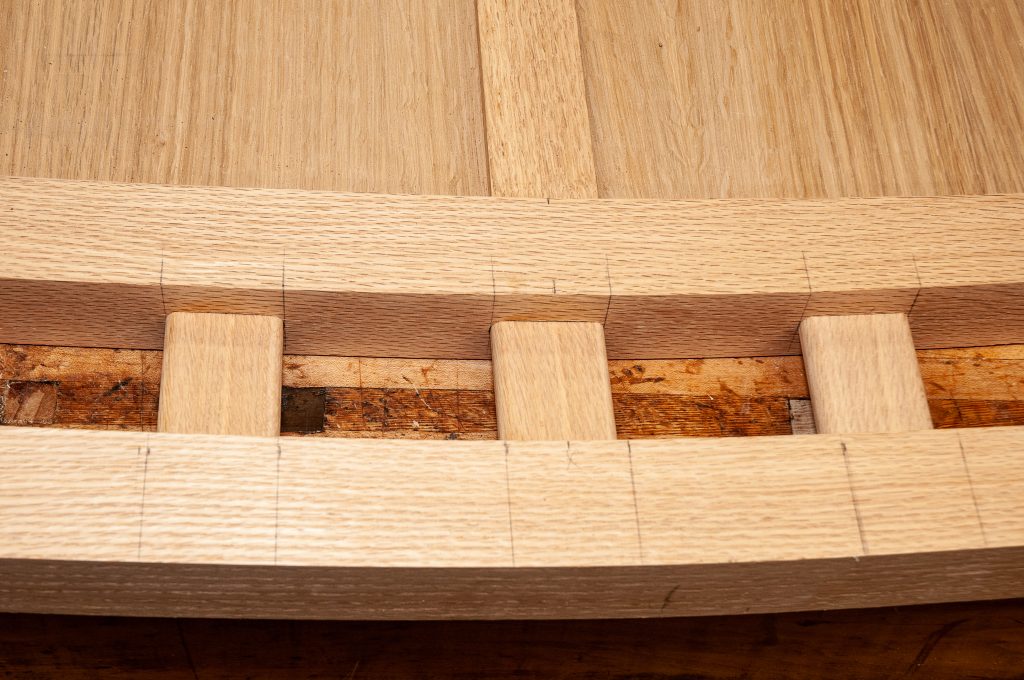
The spindles on the headboard arches are made from stock that was leftover from Isla’s crib. They are 1 3/4″ wide and 1/2″ thick. They fit into plunge cut dadoes in the arches. A 1/2″ solid carbide end mill was used to make the cuts. The router is guided by a fence. When routing with a fence you want the router cut to pull the fence tight against the work piece, so that you are not fighting the tool and risking an errant cut. So with the fence on the side towards you, the cut progresses left to right.
Knowing where to stop the cut, is the hardest part, as the marks are obscured by sawdust and often some smoke. 
To make the start and stop points more visible, I use green masking tape, which is made for striping. It is thinner and stickier than the blue tape. The color also provides a lot of contrast against the wood. The next trick, is to plunge the start and end of the cut straight down. This makes for an easy start and stop for the successive passes. Each pass should be half of the diameter of the bit or less. This is a general rule I learned when calculating feeds and speeds for the CNC router. With the ends of the cut defined you don’t have to try to start and stop exactly on the line, which takes a lot of the stress out of the cuts.
Biscuits in small close quarters
The stock width for the legs and arches does not allow much room for error with the biscuits. There are #0 biscuits on the tops of the legs and # 10 on the sides. There is <1/8″ of width left over on the cuts, so any slippage will show. Additionally, the ends of the pieces are too narrow for the retractable pins of the biscuit jointer to grab hold. So, my cure was to clamp the piece down firmly so it does not move and then clamp the biscuit jointer fence to the piece prior to plunging in. This took the risk and suspense out of the cuts. It just took ~30 seconds longer to set up for each cut.
Biscuits for the plywood boxes
The base of the bed is made from plywood and biscuited together. To have good alignment of the parts requires that a fence be clamped to the parts prior to cutting and the measurements for the middle dividers be made consistently from one end (foot end was my choice).
Clamps as squares
 The boxes for the drawers under the bed need to be square. The easy way to achieve this (other than good square cuts) is to use the clamps as part of the jigs to square up the box. By placing the end clamps tight up against the box sides, they cause the box to self align. Note that you need large parallel face clamps like the Bessey K-body or Jorgensen Cabinet Master or Revo . Ordinary F clamps or pipe clamps will not work for this trick.


