Completing the rails
Today’s tasks included completing the front and back top rails and making the bottom plates that fasten the ends to the front and back .
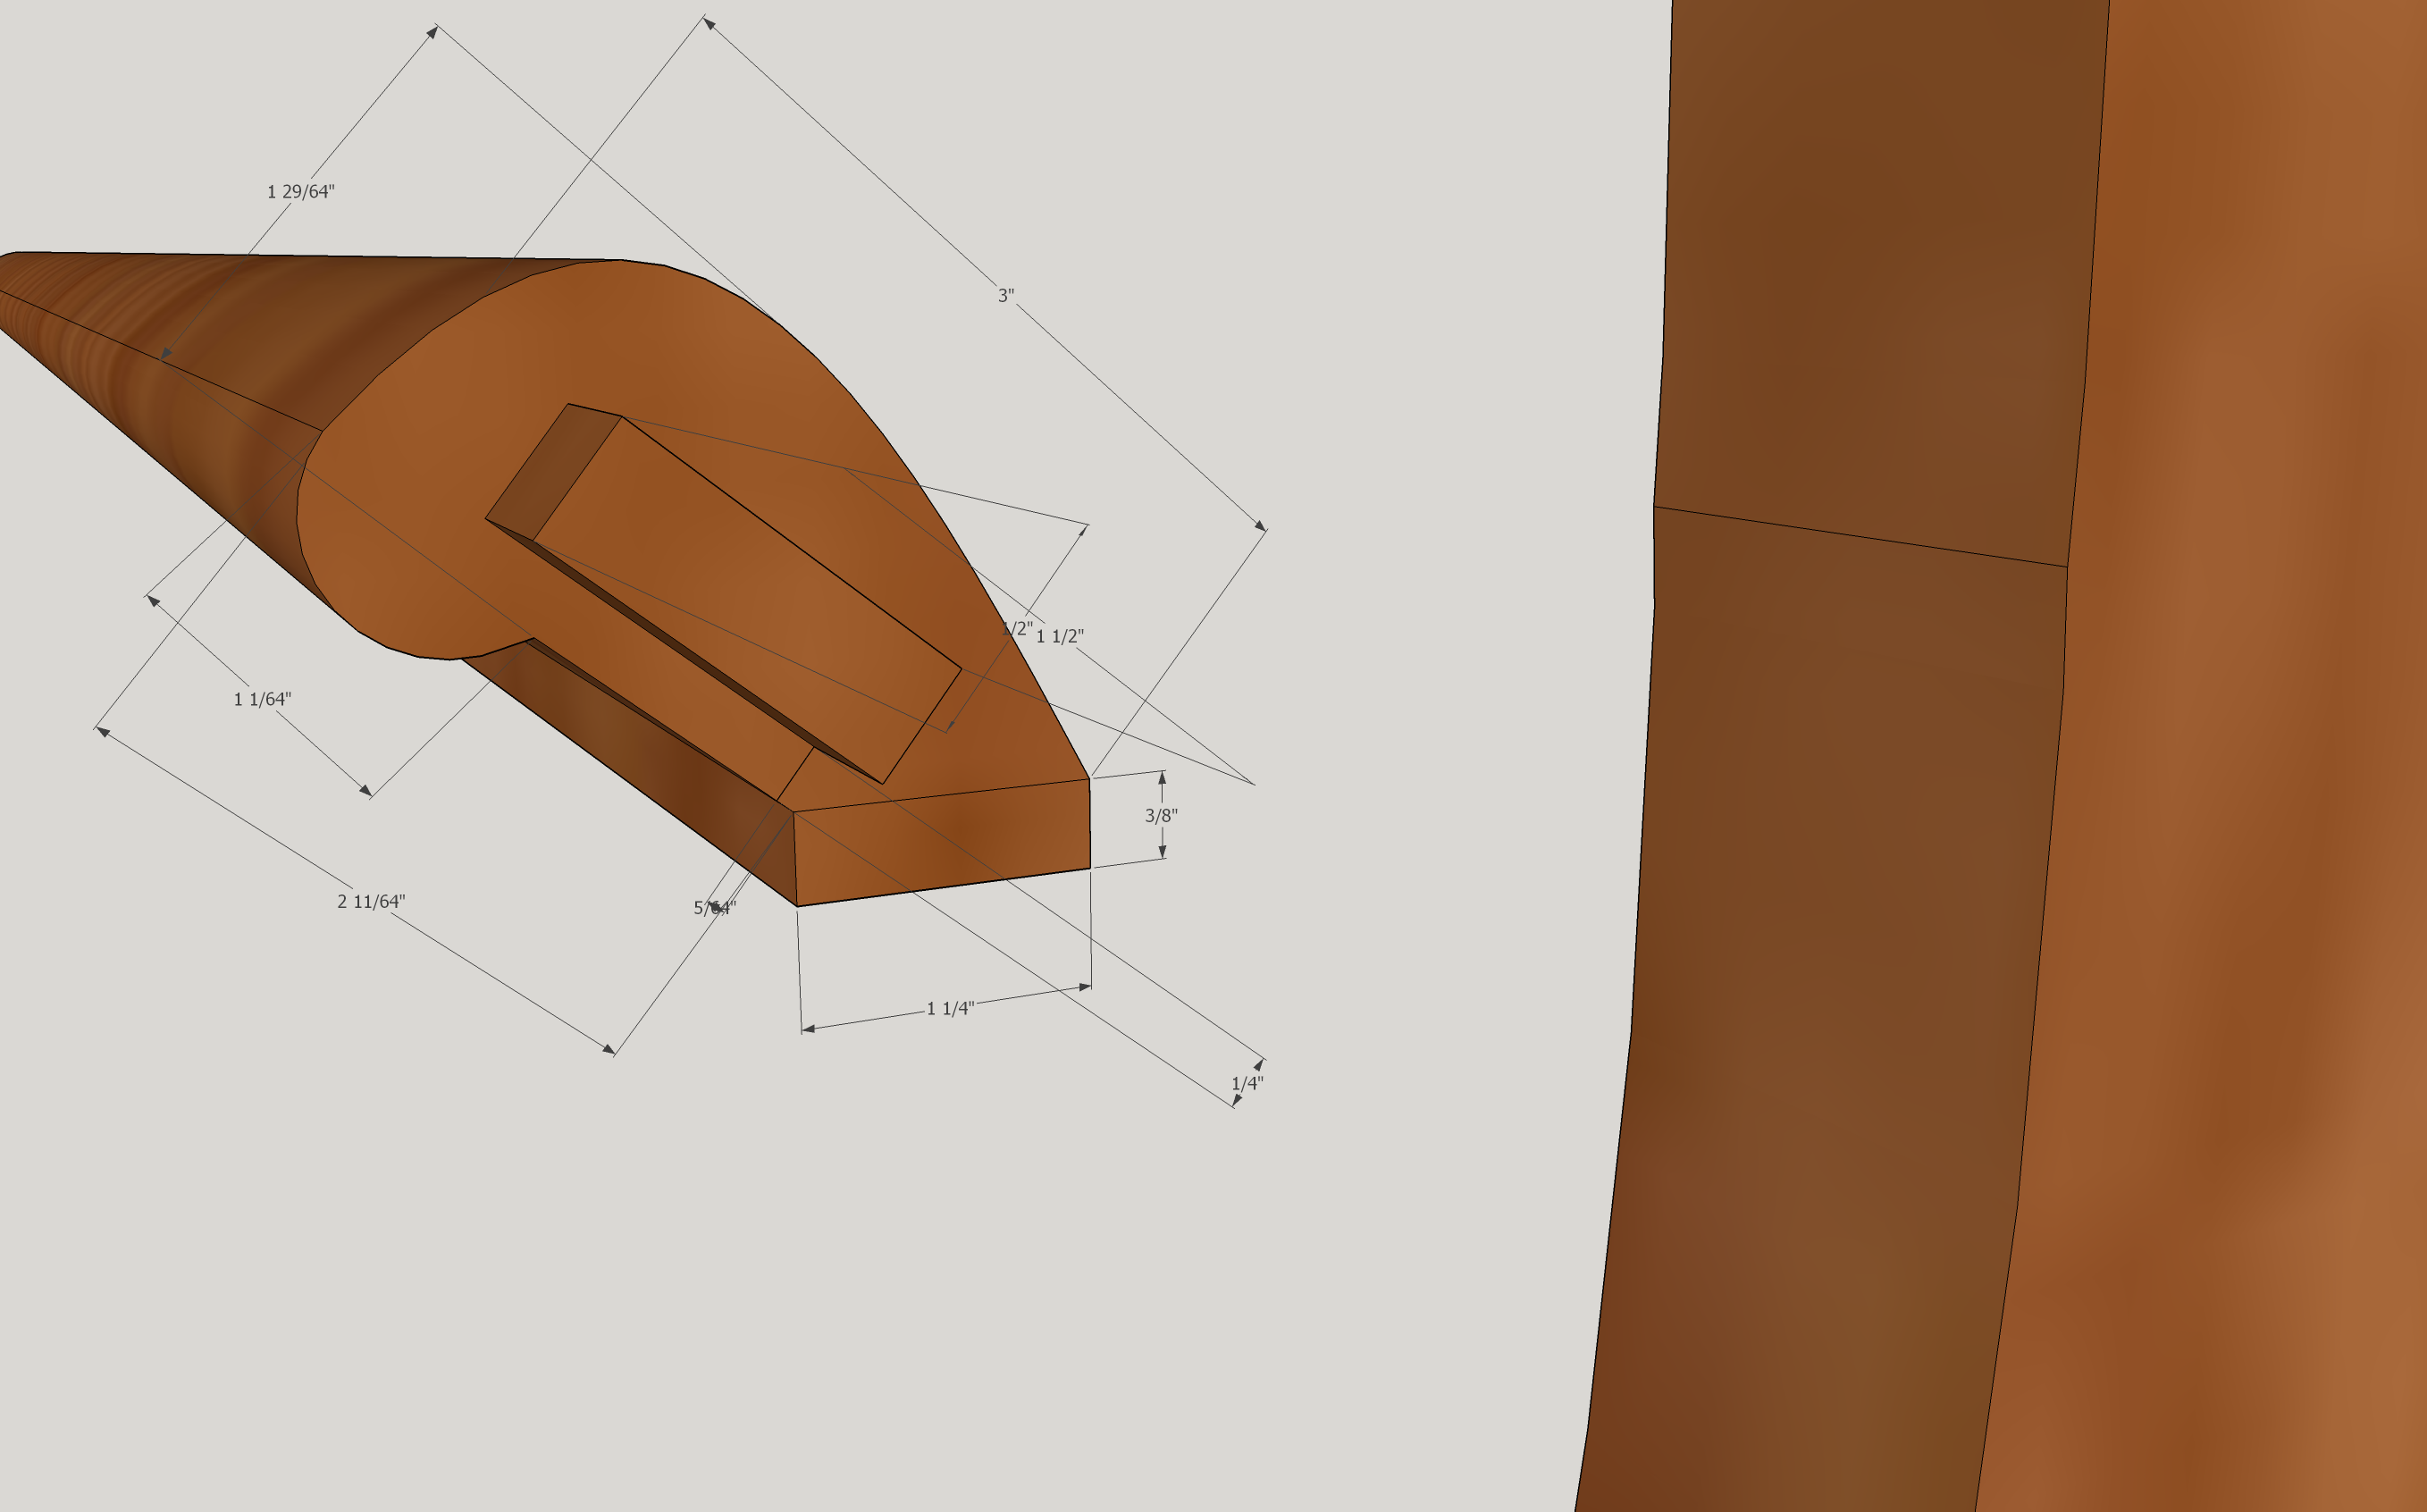
The top rails needed to be transformed into the sleek shapes in the drawing. This meant making the under-hanging lip, adding it to the rail and the generating the sweeping curve of the rail top.
The underhanging lip is a 1/2″ thick semicircular segment which is then glued to the rest of the top rail. To safely and accurately make a shape like this you must start out with a larger piece, shape the edge and then rip it off. Below you can see the stock being run through on the router table with a 1/2″ radius round over bit. The fence is set flush with the front edge of the router bearing. The fence is needed as the bearing of the router bit will not be landing on un-cut stock and it provides the needed support for the cutting depth. The feather boards help to both guide the stock and keep my fingers clear of the spinning router bit.

 After the profile is cut with the router, it is then ripped off on the table saw.


This profile was the glued on to the top rail. You can see it as the bulge in the lower left of the rail as seen below. The drawing of the rail end was the printed out square with the end and with no perspective in Sketchup. This was then printed life size (which took several tries). The print out was the cut out and placed over the ends of the rails and the outline traced with a sharpie.
The corners and excess were then saw off on the bandsaw and table saw. At this point the goal is to have a rough approximation of the curve which is ready for hand shaping. The bandsaw with the table tilted offers a safer alternative to the table saw when there is a small land / support area under the base of the stock and the cut has no support directly underneath it. Be careful here, greater overhang under the cut can fling the stock or break the blade if you lose control. In retrospect a feather board behind the blade would have been a good idea here.
 Now comes the exercise part. There was a LOT of hand planing required to get to the final profile. Remember this is Oak. It took just over an hour to plane the rails and another 1/2 hour of sanding and touch up planing. I started with a #6 plane set for a fairly aggressive cut. The shavings piled up quickly and my heart rate rose as well. I think I was excused from skipping my usual workout on the elliptical (the shirt did not stay on long after this photo).

When planing a curve like this, you start out with the facets cut on the saws approximating the curve. With the plane, you basically bisect each facet, adding new ones and incrementally going from a rough set of angular faces to an ever better approximation of the curve. The sound of the plane and touch of your fingers guides where to make each cut, angling each one differently than the prior one. After planing, then the sanding starts with 80 grit cloth backed paper on a long stick.
Side brackets
The next step was to start cutting the brackets which hold the end pieces to the legs. I wanted to minimize the visible hardware on the final bed, sacrificing a bit on having more hardware showing on the crib. The ends are held on with 12 gauge steel plate brackets (about 0.1″ thick) . The brackets are cut out with the plasma cutter (much more fun than a saw).
 The brackets are then drilled to 1/4″ for the screws and then the locations are marked with a transfer punch. The holes are drilled and brass threaded inserts are screwed into the wood. Below you can see the frame with the bottom bakets in place and ready to start making the top end brackets.
