Completed renderings
Today was Jessie’s baby shower. So I had a lot of opportunities to show off the design and gain some consensus on undecided points by 3 generations of mothers.
This image hides the front of the crib, so you can have a clear view of the back panels. 
The are 2 back panels each 1/2 ” thick. They are simple flat panel and frame construction. The stiles are 3/4 ” thick. The flat back panels were a hit especially by those such as Kelly who have had to clean up after the ejection of “processed formula”.

The slats are 1.75″ x 1/2″ wide with 3/16″ radiused corners. I need to remember to order some new router bits for the roundovers and the mortises…
The front and back lower rail bottom edges were lowered 1″ to allow for greater overlap with the mattress sides when it is in the bottom position (on the floor.

The inside of side rails will now be flush with the inside of the legs. This will mean there will be one screw per leg visible in the end. I am still not sure if they will be inserted from the top or sides. That will have to wait until I have the parts in hand.
Inside dimensions were double checked against the standards. I want the mattress to fit properly and not have too much of a gap.
Having the riser under the top horizontal rails will also allow it to have the mortises cut accurately without having to worry about how to jig up the curved front and back top rails.
The idea of doing some inlay work was rejected. So much for Isla’s palm trees.
Assembly preview
As you can see above, all of the joints have a reveal. So this can be a “finish first and glue up later” process for the finishing and assembly as I have done on the craftsman style beds. This saves a LOT of time sanding, cleaning up glue squeeze out and removes worries about glue blotches. I use pigmented and thickened epoxy for the glue up. Additionally the longer set up time with a slow curing hardener allows for the alignment of the many parts that are in each assembly.
Below is a preview of this finish and assembly technique from prior projects.
Over one hundred spindles laid out and ready for finish coats. Racked out and ready for the spray, turn, spray, turn, repeat routine. Spraying on the final coats on an unseasonably warm March day for Teal’s and my bed.
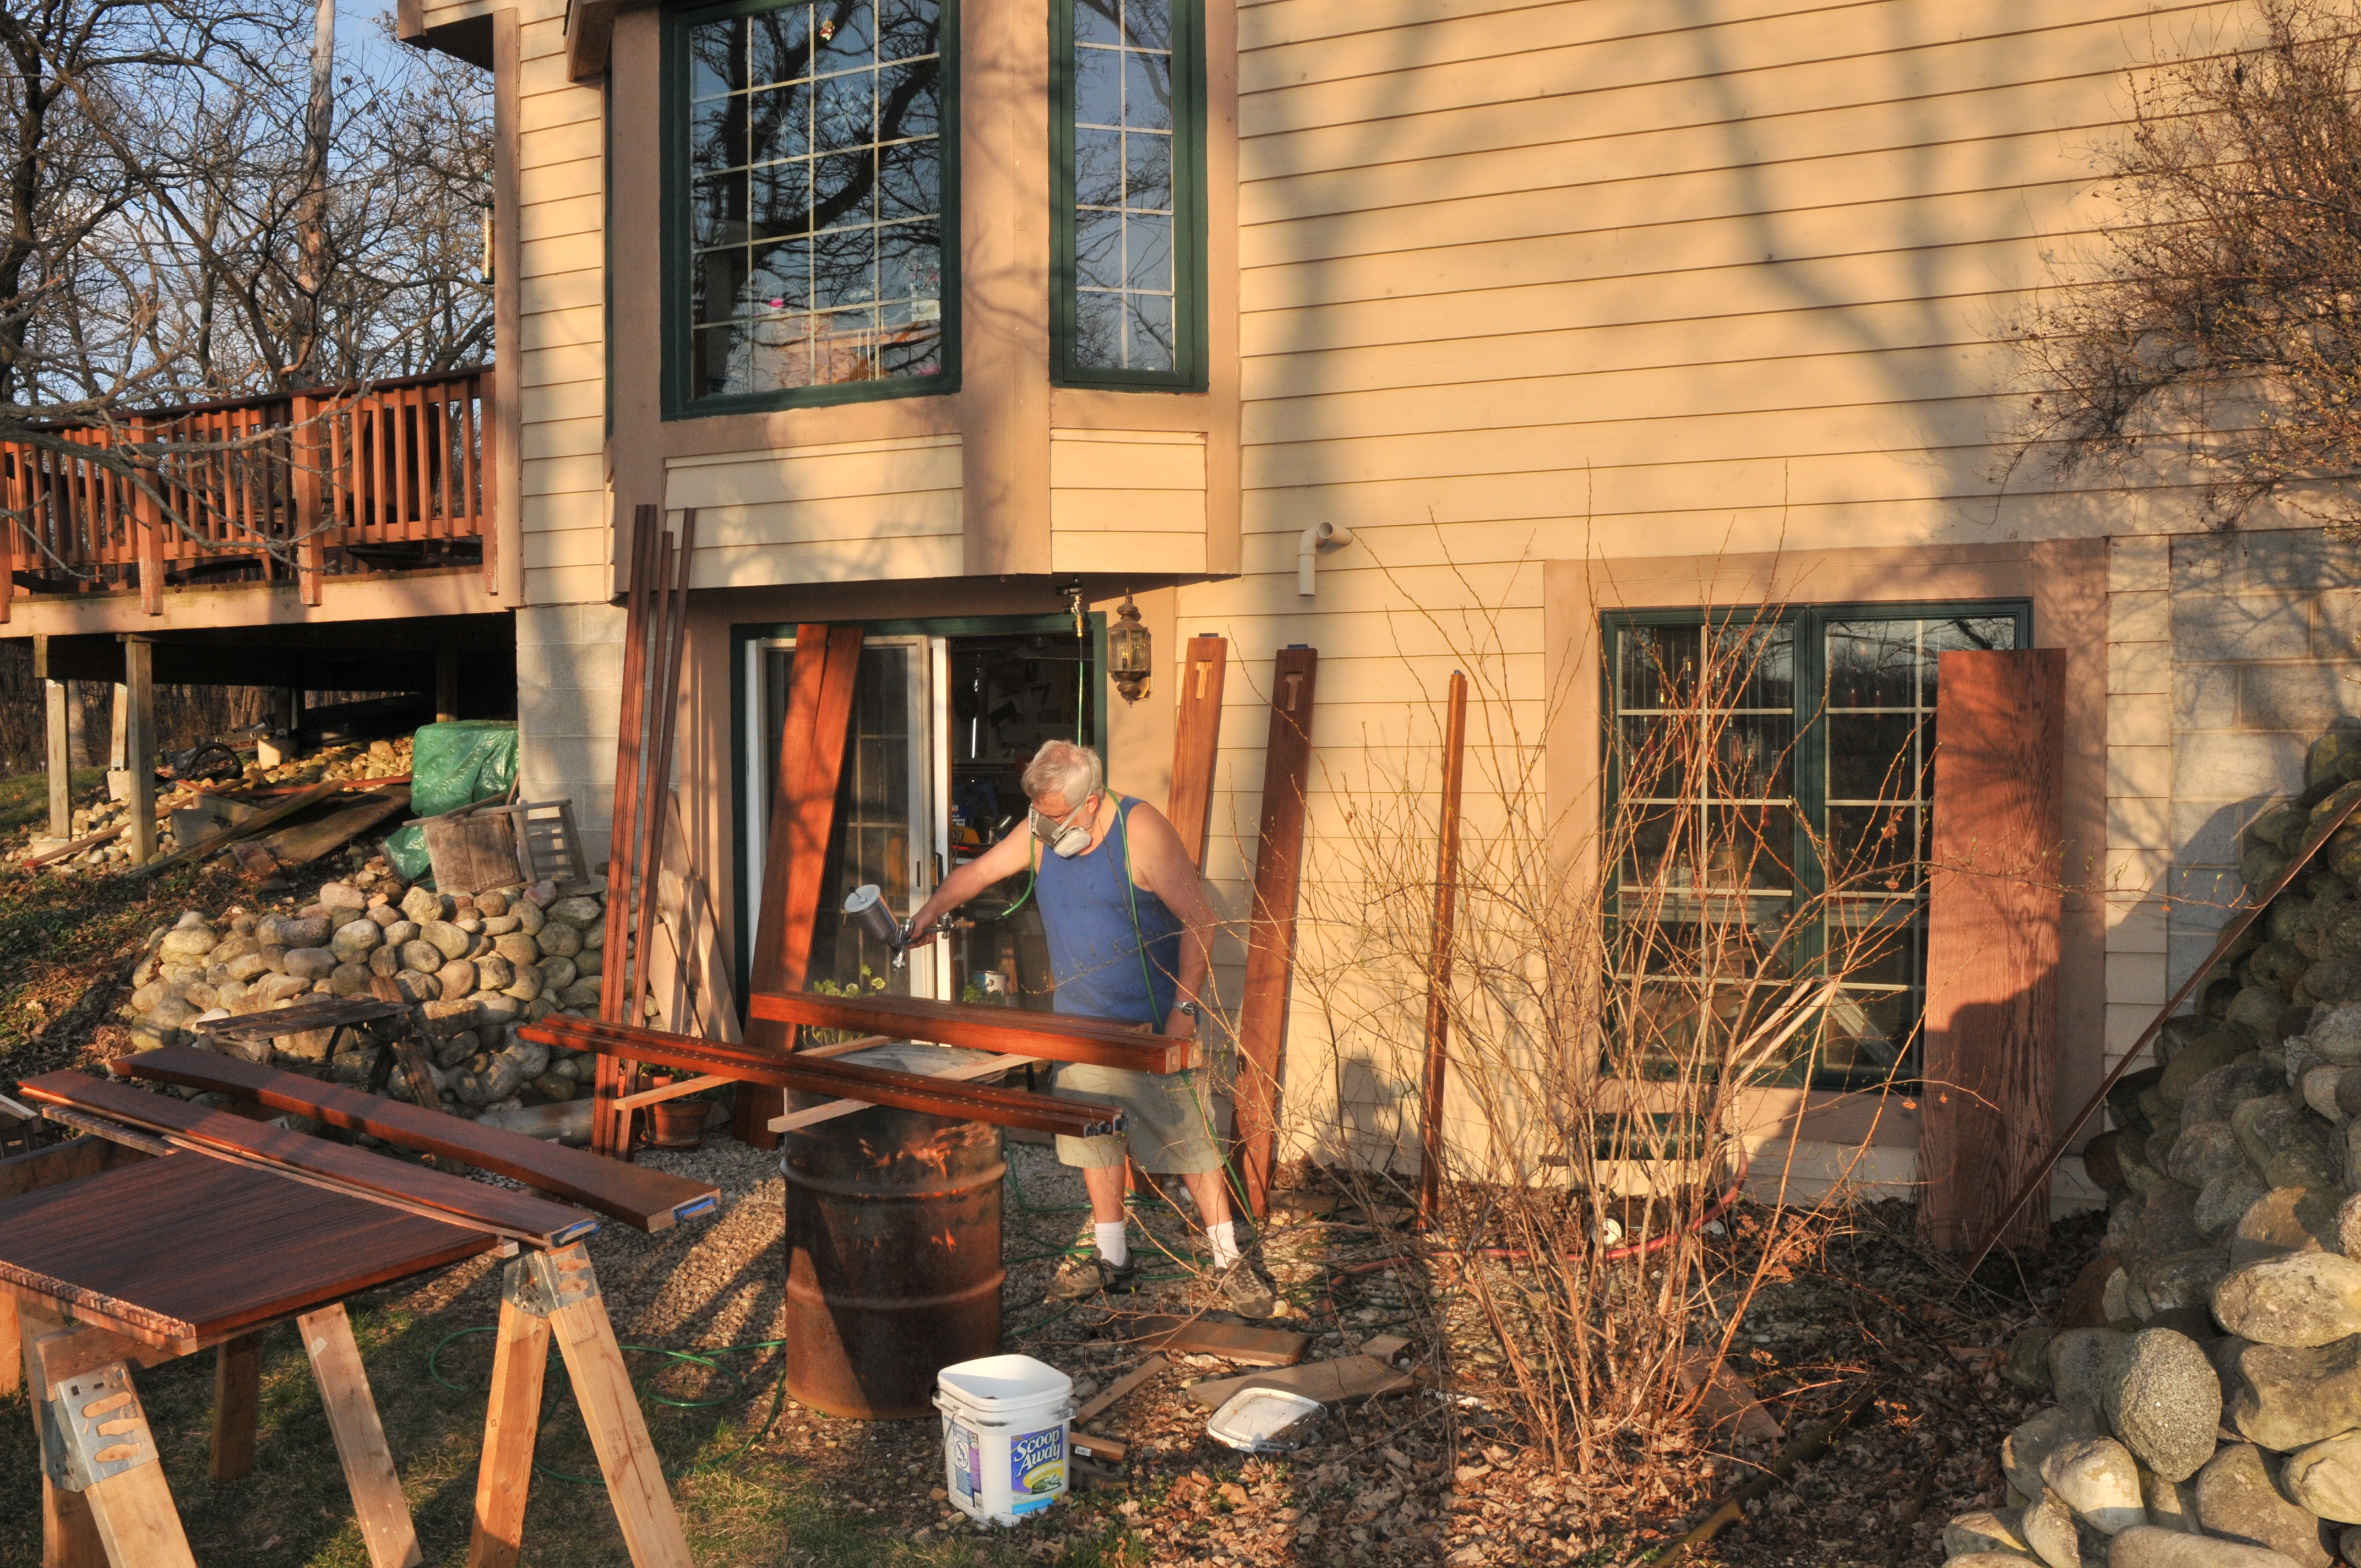 Dry fit assembly and masking the joints on Elyse’s bed.

Glued up and inserting the tenons. Note the chocolate color of the epoxy.
 Glue squeeze out prior to clean up with a plastic scraper and denatured alcohol.
Cleaned up after final paring of the last of the squeeze out 8 hours later. Most is wiped up early but there are some areas that it is better to wait and pare off later. At this stage the epoxy is sort of the consistency of cheddar cheese and cleans up nicely. It is not yet rock hard as it will be at about 24-36 hours.  Final joint appearance.