Scraping for finishing
While applying the final coats of epoxy and varnish, there are times when it can be quite frustrating. At times it may seem like you have:
- Sanded off nearly as much epoxy or varnish as you have applied
- Sanded through the “nice” part of the finish while trying to remove drips, runs, sags – bare wood plus a nearly intact run!
- Paid more for sandpaper than the wood you are sanding (well maybe not quite)
Finishing is not my favorite part of building boats or furniture. I love the construction and the final finishing steps where the glossy finish shows off all of my hard work. Conversely, the seemingly interminable sanding sometime makes me wonder why I started this project.
Mental breakthrough
This spring (2002) I finally got around to varnishing the inside of my Riviera. I know I should have done this 2 years ago, but we wanted to use it and I was putting off all of the sanding required.
An article in Wooden Boat #165 (2002) helped immensely. It covered using scrapers for finishing. Talk about having a mental block. I use scrapers frequently on furniture and in some cases don’t sand at all, but only scrape and plane. Unfortunately, on the boat I did not even think of using them! The interior of the hull has MANY inside corners which make sanding no fun (hard to do and leads to bashed finger tips). With a scraper it goes SOOOOO much easier and quicker that it is almost unbelievable. In addition, the greater control with the scraper makes it something I can had to the kids to do. With sandpaper, they had too many sand thought to make it worth it. It is great to have the kids do the engine compartment – they fit so much better than I do, and end up with fewer aches and pains (or at least I do).
Typical cost for scrapers is $5-18 each.
Preparation
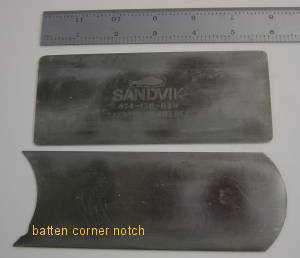
We started by modifying the scrapers. The rectangular one has the corners rounded to match the radius of the fillets. There are 2 different radii used. The one with the curved ends has a notch filed that matches the top radius of the battens. The ruler in the background shows the scale of the scrapers.
Filing
To prepare the scrapers for use, the edges are filed square. For this, clamp the scraper in a vise and file the edge with a 10 or 12″ mill bastard file. Run the file lengthwise. It should glide / cut smoothly. If you hear a squeal or chatter, slow your cut as the chatter will leave a serrated edge. I file all edges prior to proceeding to the next step. If there is a burr on the edges, place the file flat on the face and remove it or hone it. For the rounded corner, I use a 6 or 8″ file. For the inside corners, a chain saw file works well.
If you are in the final finishing stages hone the faces and edge square if you are in the final finish stages. For the early coats, this step is not necessary. Hone on a 800-1200 grit water stone or soft Arkansas oil stone. Otherwise you can skip this step
Turn the burr
The next step is to turn the burr on the edge. If you tried to scrape at this point you would just get powder, not shavings. To turn the burr you can use a screwdriver or a dedicated burnisher. I use an old screwdriver. I like a ~1/4″ diameter shaft. Preferably it is hard plain steel, but chromed will work. The scraper is still clamped in the vise. I let the handle ride against the far edge – the one not being burnished, as shown in the photo. By letting the the handle ride against the edge, you avoid slipping and inadvertently slicing a fingertip open on on the sharp edge (yes, it is very sharp, as I have proven to myself).

Three to five stokes is all that are needed. 90, 88, 86-87 degrees for each side. Turn the burr on on edge and then reverse the screwdriver and do the opposite. Then, proceed to the other sides of the scraper. When you are done, you will have 8 sharp edges on each scraper. Total time to sharpen and turn the burrs is less than 3 minutes.
I do not repeatedly turn new burrs without filing as each one becomes dull. Others recommend it, but I have had problems with a rounded over burr and an “unsharpenable” edge. It only takes 2-3 strokes with the file to get ready for the new burr. For each sharpening with the file only a few thousandths of an inch are remove, so the scraper blade will last a LONG time.
Scraping
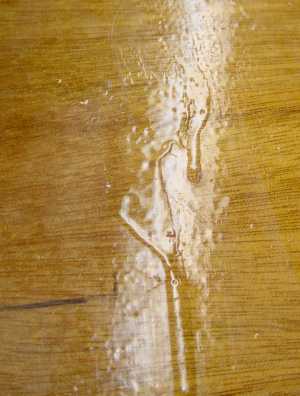
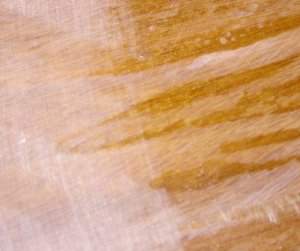
For my example I have a section of plywood coated with 3 coats of epoxy. The surface is a bit rough and there are some runs to take out. The reflection from the fluorescent lights help show off the runs.
The next shot shows the same sample after just 2 strokes with the scraper. The shavings are the epoxy removed from the runs. Note the background has not yet been touched.
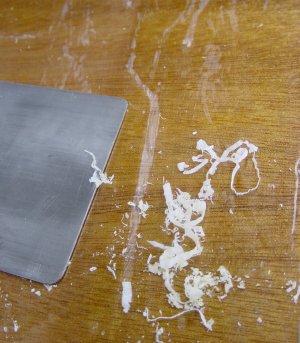
The shavings are extremely thin and continuous. After a few more strokes the pile of shavings grow.. No dust in the air, no changing sandpaper. The normal stroke is a pull stroke, but don’t be afraid to push in difficult inside areas (although this does knock the burr down quickly).
When the burr edge becomes visible in reflected light, it is dull. The other telltale sign is that you no longer get shavings, but only powder. The dull edge still cuts, but much more slowly.
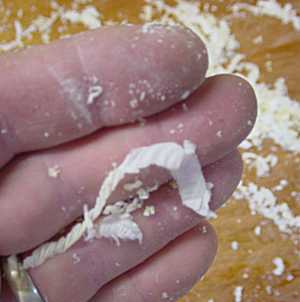
The next photo shows the shavings on my fingertips, providing a better idea of the scale of them.
One of the added benefits of scraping versus sanding is the higher level of control that the scraper provides. When sanding, especially contoured surfaces, the sandpaper contacts more of the surface than merely the high points as it conforms to the surface and slowly wears off the peaks faster than the valleys. \
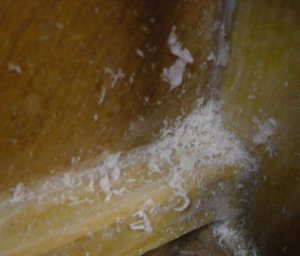
This difference is apparent in the next photo where the same sample has been scraped and sanded. The sanding is against the grain and drips to show up better in the photo. This does help it skip the valleys better, than if it had been sanded with the grain and drips. Where it would conform more and make the sand though problem worse.. The right side was scraped and the left side was sanded.
Finishing
Prior to varnishing, I do make one more light pass with sandpaper to take out any chatter marks and remove any facets on outside corners. This is a very light pass compared to “normal” sanding.
Conclusion
By adding some scrapers to your tools and techniques you will be able to:
- Finish your projects more quickly
- Save (considerable) money compared to sanding
- Proceed with greater confidence, having one more technique in your bag of tricks
Other links and resources:
Then Hand Plane Book by Garrett Hack – Taunton Press. This has an excellent chapter on scrapers and scraper planes.
Fine woodworking video on card scrapers by Garrett Hack https://www.finewoodworking.com/2014/04/25/an-introduction-to-card-scrapers
Building my boat https://bronkalla.com/index_boat.html This a Glen-l Riviera inboard runabout.
Sources
Cabinet scraper set https://amzn.to/3ClXhwB This is an inexpensive set that curves in your grip easily.
Bahco card scraper https://amzn.to/48O7NJ7 These hold an edge for a longer time, but are very stiff and hard to curve for light cuts. Still my favorite for flat surfaces
12″ Nicholson mill bastard file https://amzn.to/3CycMBE
Note that commissions may be earned on Amazon links