
Clamp racks are an easy project with the CNC router. They are a good way to use up the ever increasing pile of plywood scraps.

I had an old and very simple rack for F clamps above the bench by the radial arm saws. However, it is not very convenient requiring a long reach to pull the clamps and some of the import clamps do not fit over the bar very well.

Another problem is that the pipe clamps are just piled in a corner by the patio door. THey were hard to get to and I was afraid of cracking the glass.
So, with some downtime from larger projects required due to recent Cubital Tunnel release surgery and a pile of plywood scraps left over from Olivia’s bed, I decided to make new clamp racks. The idea was triggered by the new Lee Valley catalog which has single row racks for sale.
The design goals were to:
- Allow for hanging from the walls or overhead floor joists maximizing flexibility of location.
- Provide space for multiple (4-6) clamps per row for either F clamps or pipe clamps
- Use up the existing plywood scraps without creating more.
This meant that the dimensions had to be flexible to adapt to the scraps on hand without cutting into a new sheet and the “back boards” needed to be a bit tall to allow for hanging from the upstairs floor joists.

Layout for the backs was done in V-Carve Pro. The slots are 3″ high by 0.47″ wide. The mortises are then squared up with a chisel. This ended up being faster and easier than rounding the bracket tenons. You could do this with a regular router and fence as well, but remember to use 1/4 or 3/8″ bit as the slots need to be less than 1/2″ wide for a good grip on the brackets.
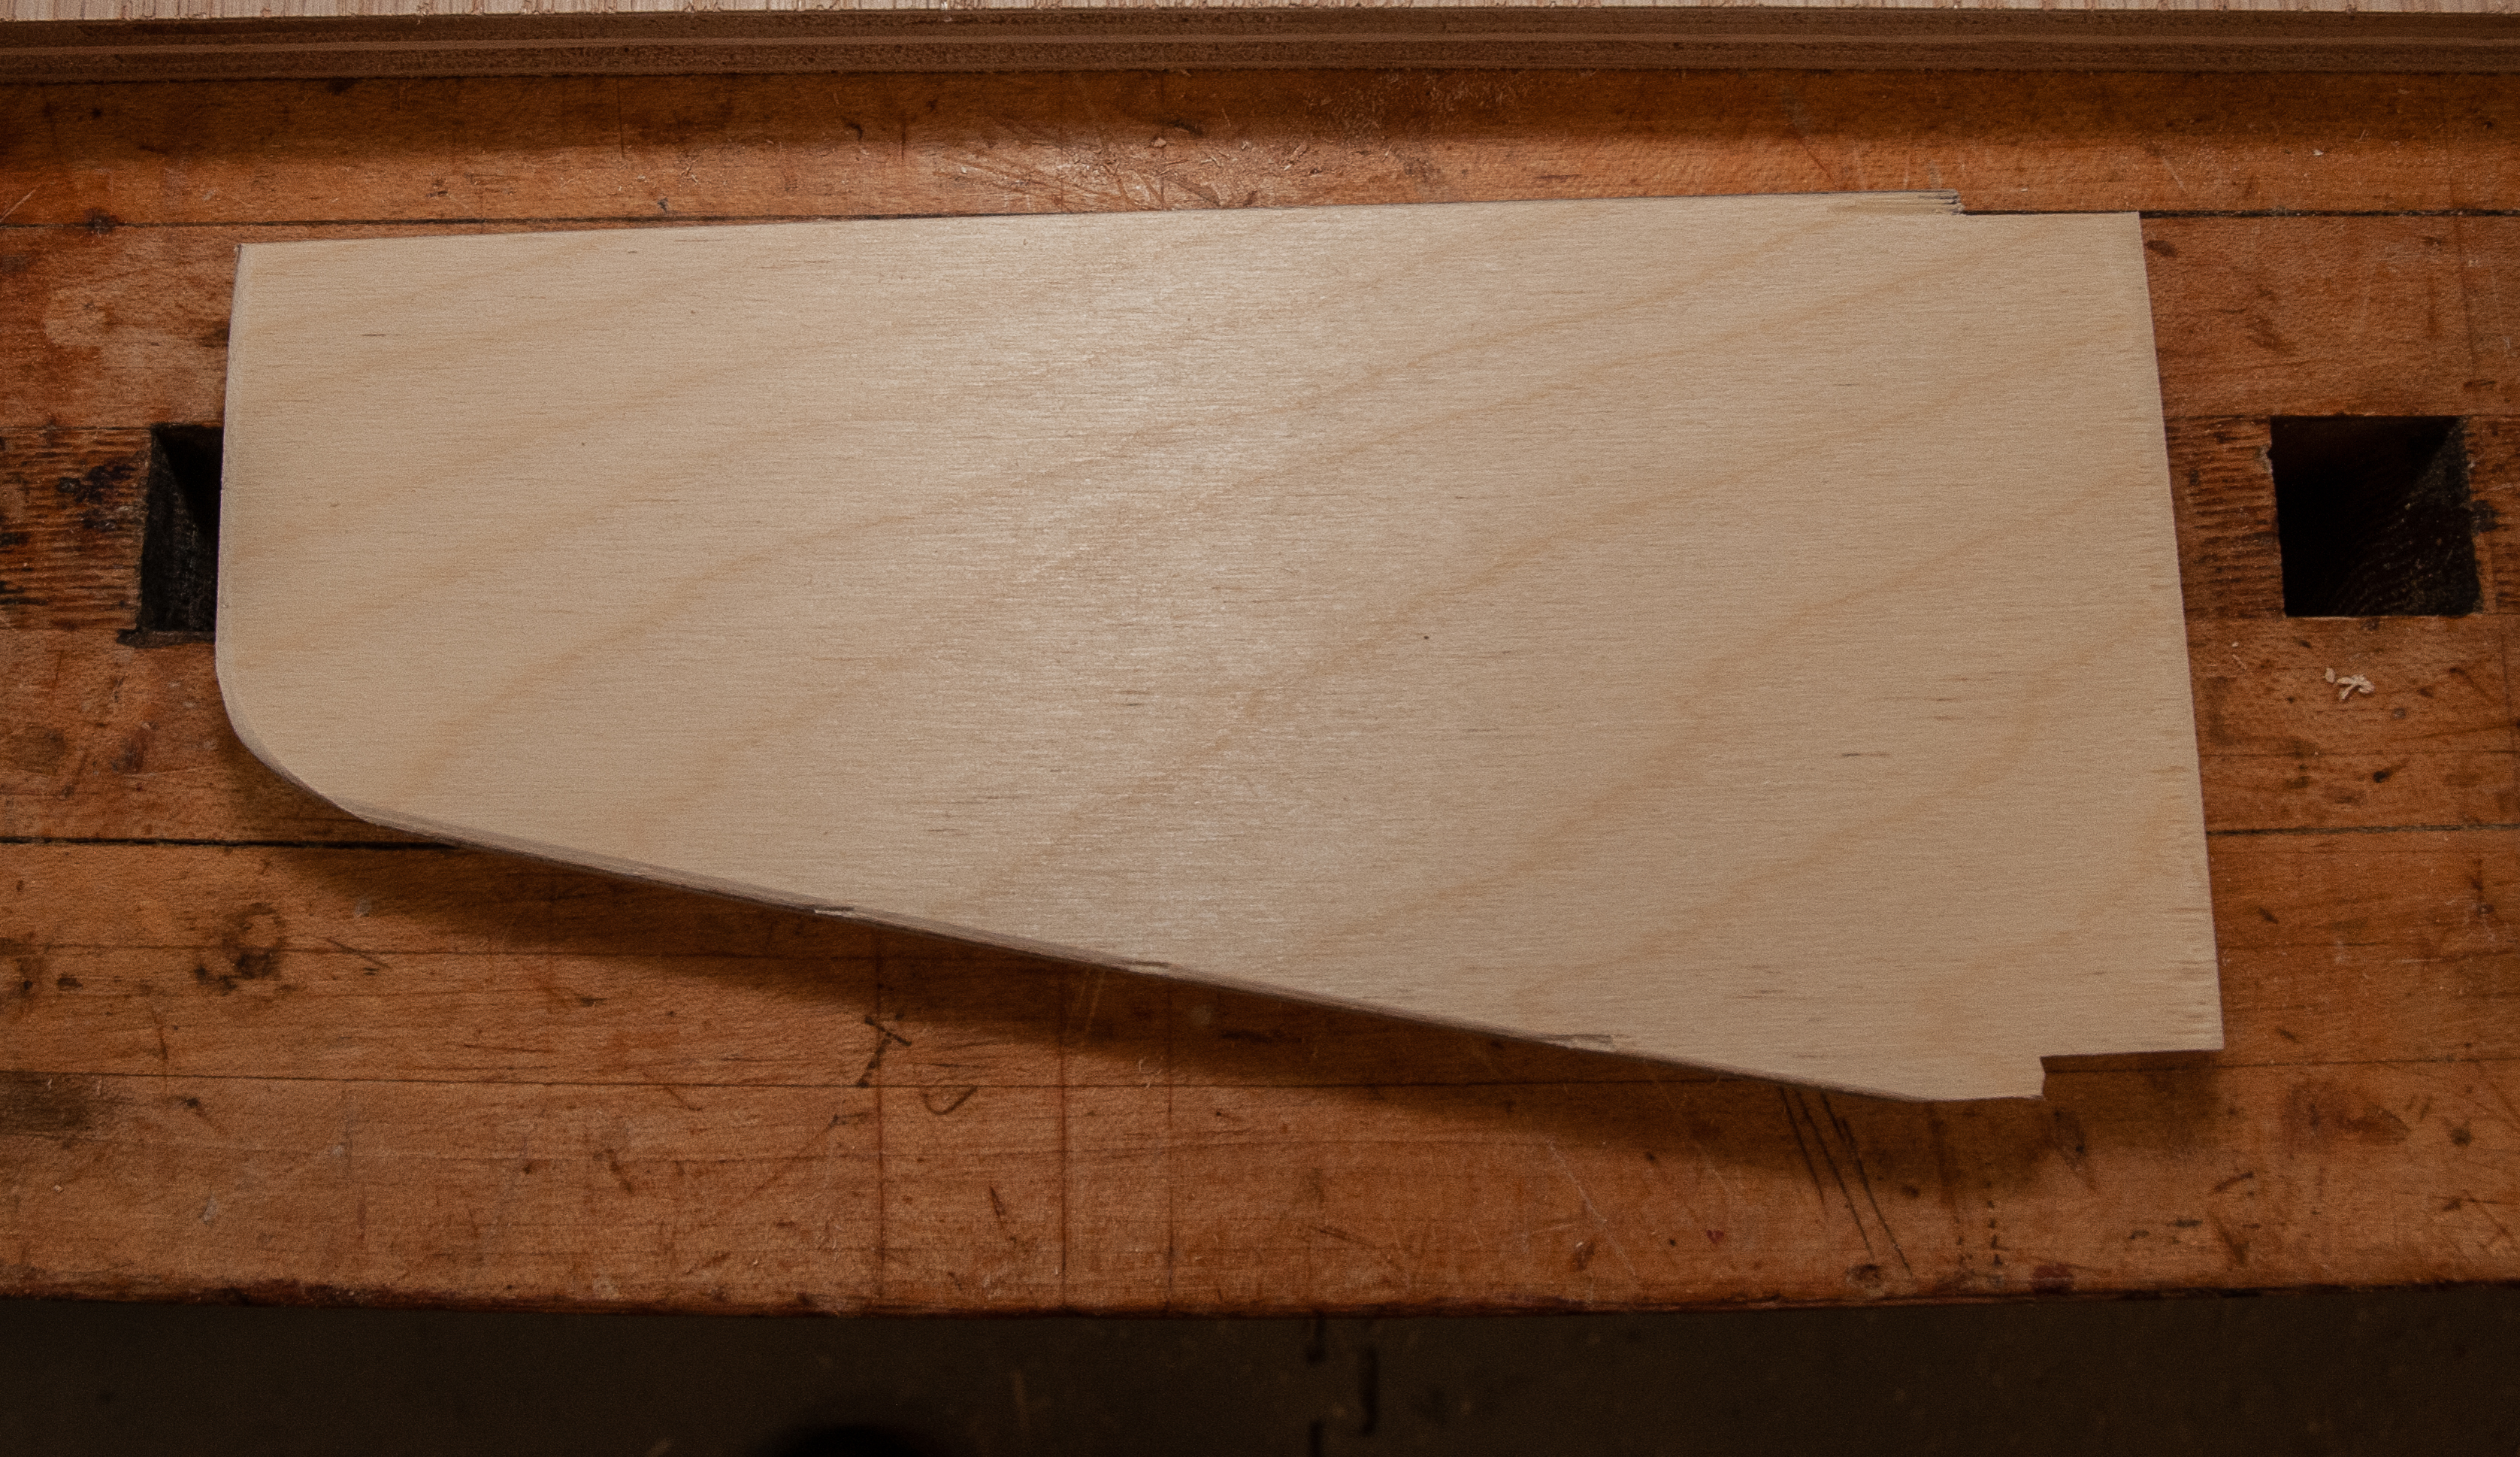 The brackets are 3.25″ tall. This was the width of several strips of baltic birch plywood that I had left over from making dresser drawers. The lengths were 7 to 8 ” depending on the rack. The bottom edge is sloped at about 12 degrees – I thought it looked better than simply leaving them square. The notches at the ends are 0.7″ tall by 1/8″ wide. This gives just enough shoulder so that the brackets are self aligning when driven home and the tenon is very slightly recessed when viewed from the back.
Apply glue to the slots and drive the brackets in with a large mallet. They are basically self clamping.

1″ screws and fender washers are added to the back for added clamping pressure and to ensure the brackets cannot pull out under load. The screws and washers had been waiting for this occasion. I had not used them previously due to bits of epoxy and the washers being stuck on the screws. They were left over from doing the deck strips of the boat.

Now the clamp racks are hung and the clamps are much neater and more accessible. Next I will need to rearrange the various jigs and other items on the back wall since they are easier to get to with the new racks.

Finish is a couple of coats of shellac. This was another left over and I need to mix up a fresh batch for the bed.
If I were doing it again I would make both racks with the jaws facing the back wall as this provides more clearance in front of the peg board.